21 Nov 2019 Configuring Paid Guest WLAN Access in cnMaestro

Configuring Paid Guest WLAN Access in cnMaestro
A question I often get asked when designing a WLAN deployment is “how can I monetise my guest wireless network?” Most of the time the answer would be implementing an externally hosted 3rd party portal solution that interacts with a payment gateway – something that adds additional cost to a deployment.
Cambium Networks’ cnMaestro platform supports a multitude of payment gateway options natively, offering a quick and easy way to design and monetise a guest wireless SSID. This document details configuration of paid guest WLAN access in cnMaestro, using a Guest Access Portal with PayPal as the payment gateway method.
PRE-REQUISITES
- The administrator must have a WLAN configured for guest access via a cnMaestro hosted Guest Access Portal.
- The administrator must have a PayPal business account.
SUPPORTED HARDWARE & SOFTWARE
- Indoor Enterprise APs: cnPilot E400/E410/E425H/E430 Wallplate/E600
- Outdoor Enterprise APs: cnPilot E500/E501S/E502S/E505/E510/E700
- Minimum cnPilot Software Version: 3.0-b24
- Minimum cnMaestro Software Version: 1.5.0
CONFIGURATION
Step 1
Create a Guest Access Portal in cnMaestro and select Paid under the Access tab. Expand the Paypal Payment Gateway option and select the Enable checkbox. Copy the URL from the Auto return URL field – this is required when configuring settings in your PayPal account.
Enabling IPN is not required unless instant payment notifications are desired by the administrator and enabling the Use Sandbox option is not required unless the administrator holds a Sandbox account with PayPal.

Step 2
In the Plan Details section, create payment options. Plan cost, session duration, device limit, quotas, and rate limits are configured in this section. NOTE: the plan names MUST NOT contain any spaces and MUST match with plan names created later in the PayPal account.

Step 3
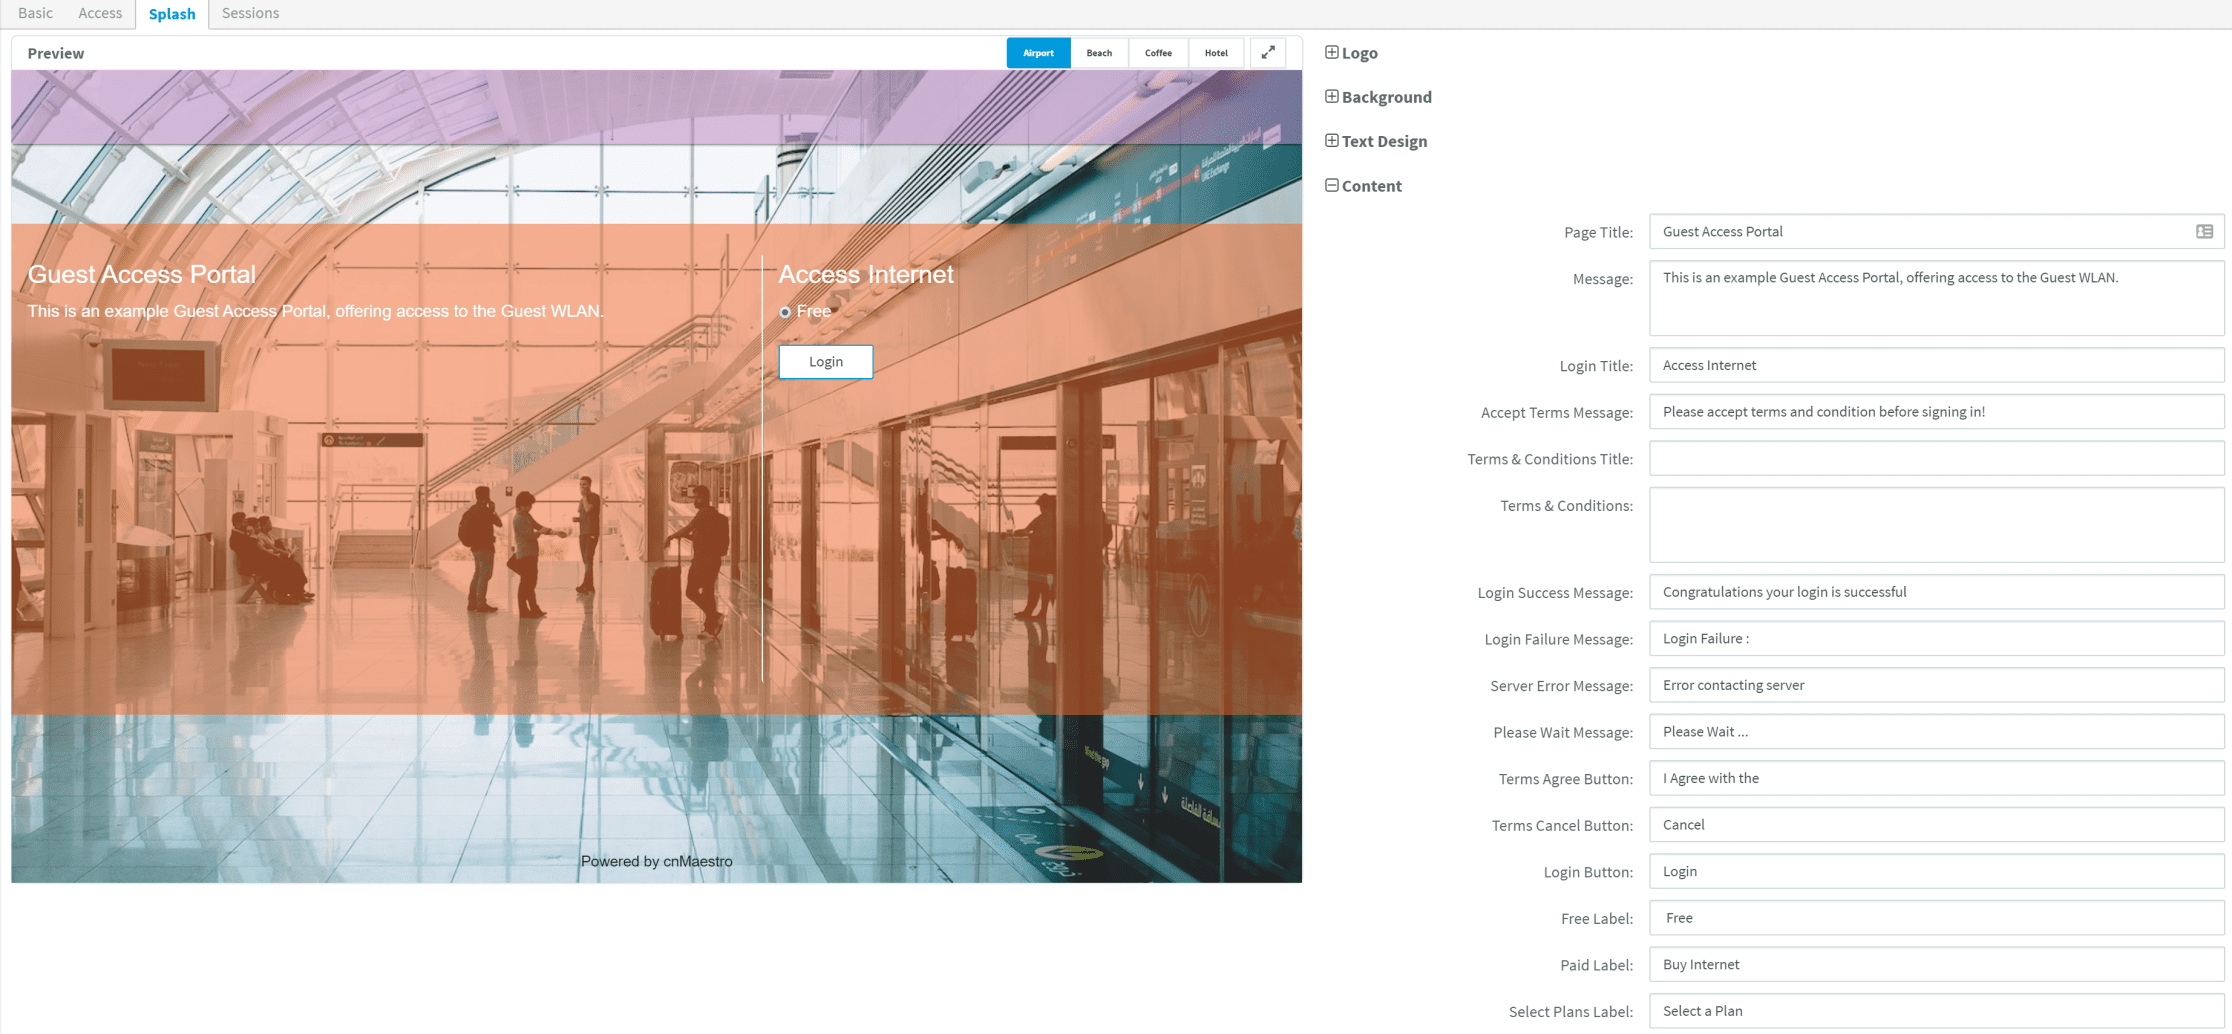
Configure the splash page design under the Splash tab and save your changes.
Step 4
Log into the PayPal business account and go to Account Settings via the gear icon.

Step 5
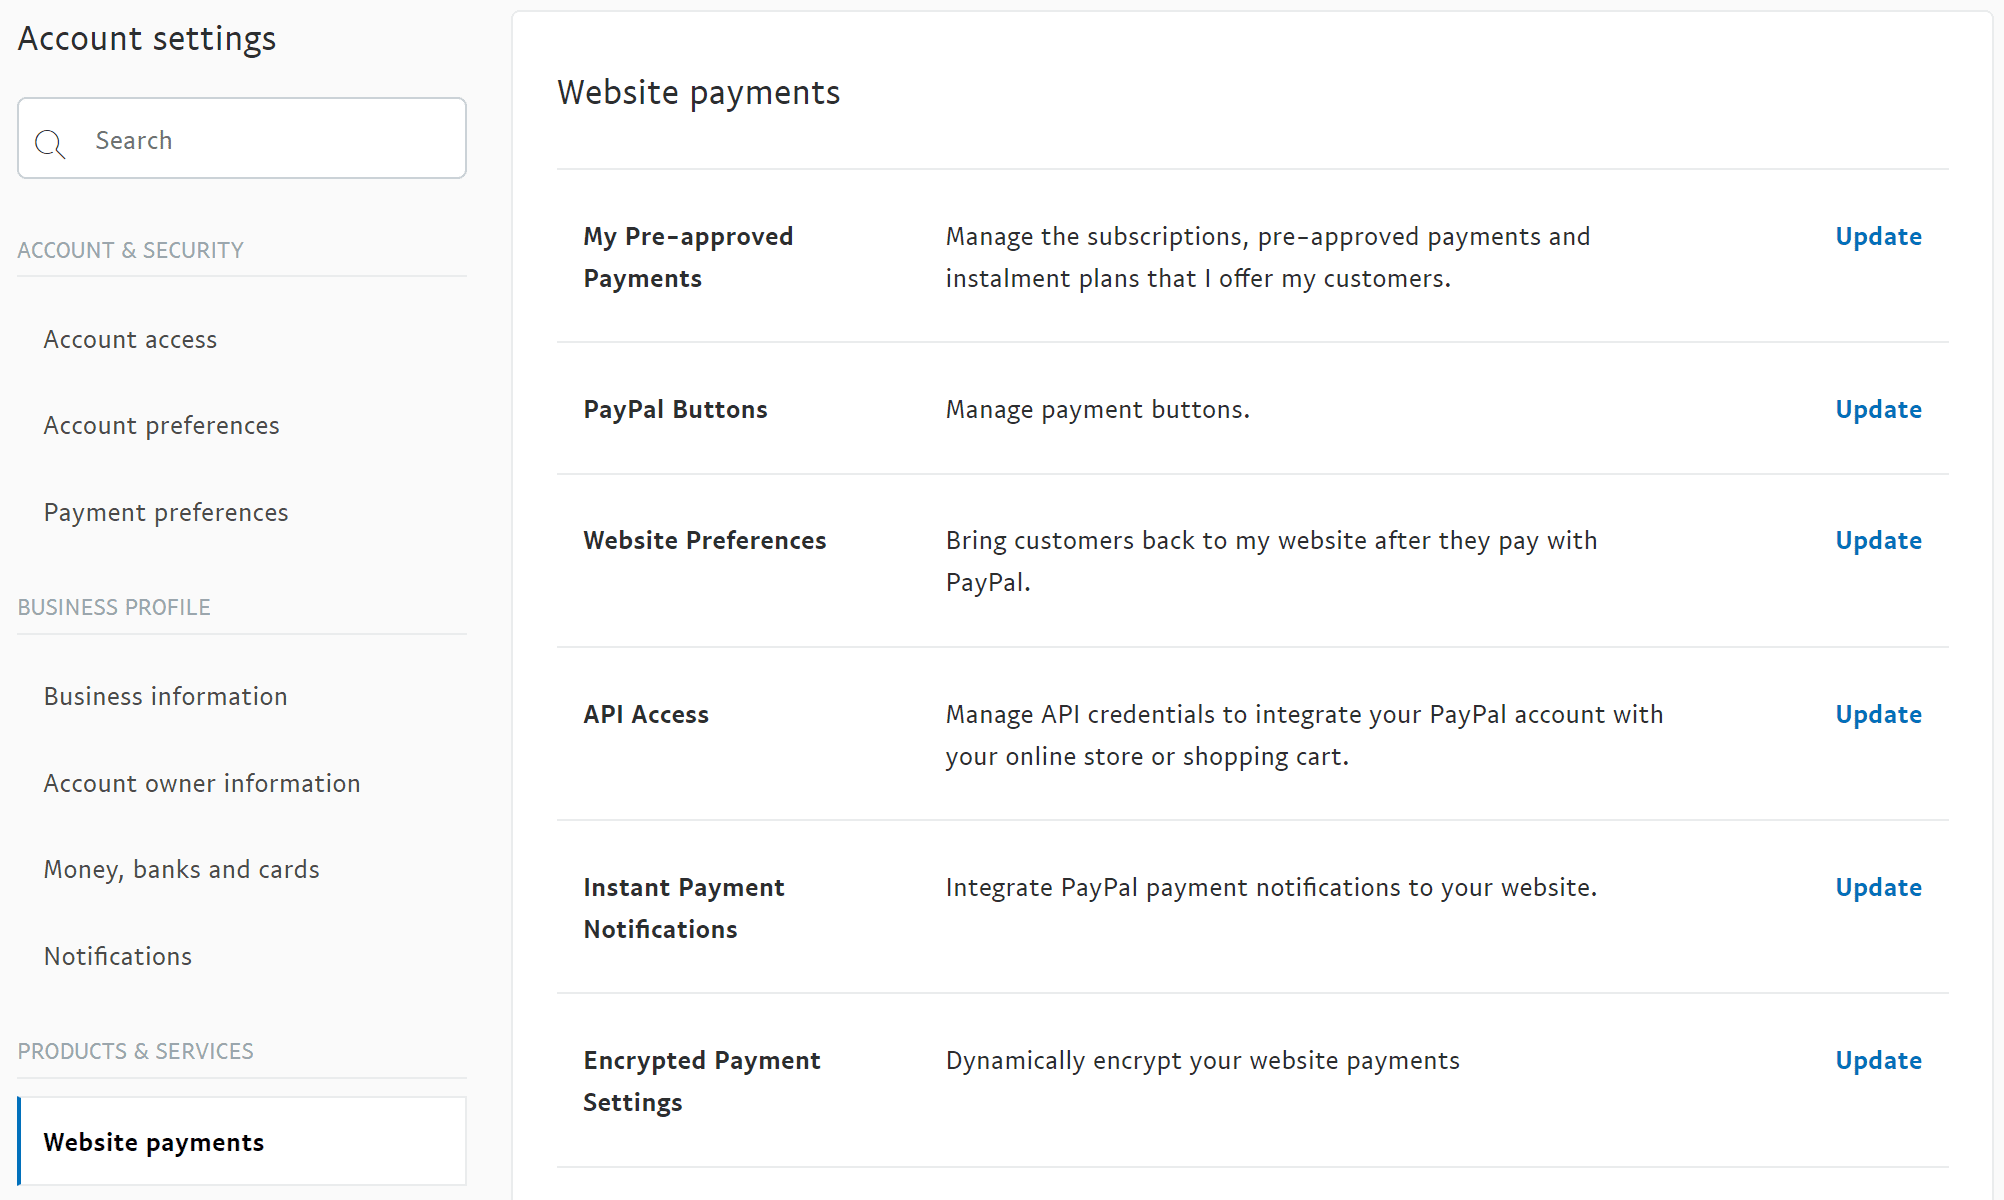
Within Account Settings go to Products & Services > Website Payments and select Website Preferences (click update to access this section).
Step 6
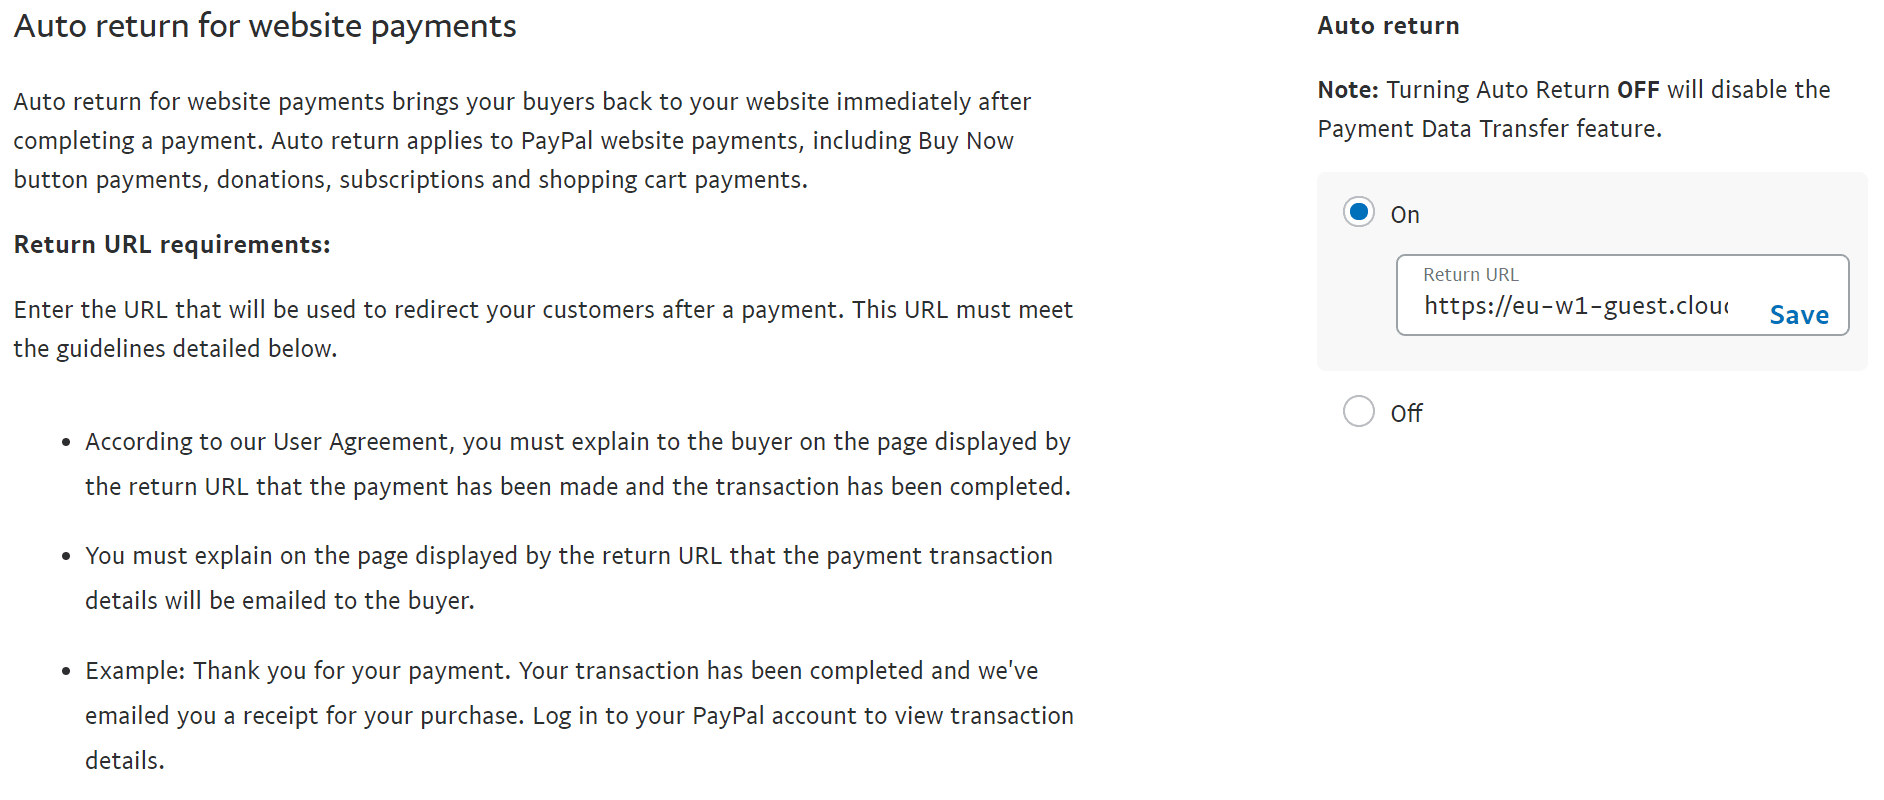
Within the Website Preferences page, firstly enable Auto Return. Enter the Auto return URL copied from cnMaestro (in step 1) in the Auto Return field and click save.
Secondly, enable Payment Data Transfer and copy & save the Identity Token – this will be pasted into the cnMaestro Guest Access Portal settings later on.

Finally, enable the PayPal account optional setting. This enables customers to pay via credit/debit card without having to have a PayPal account.

Navigate back to the profile page to save your changes.
Step 7
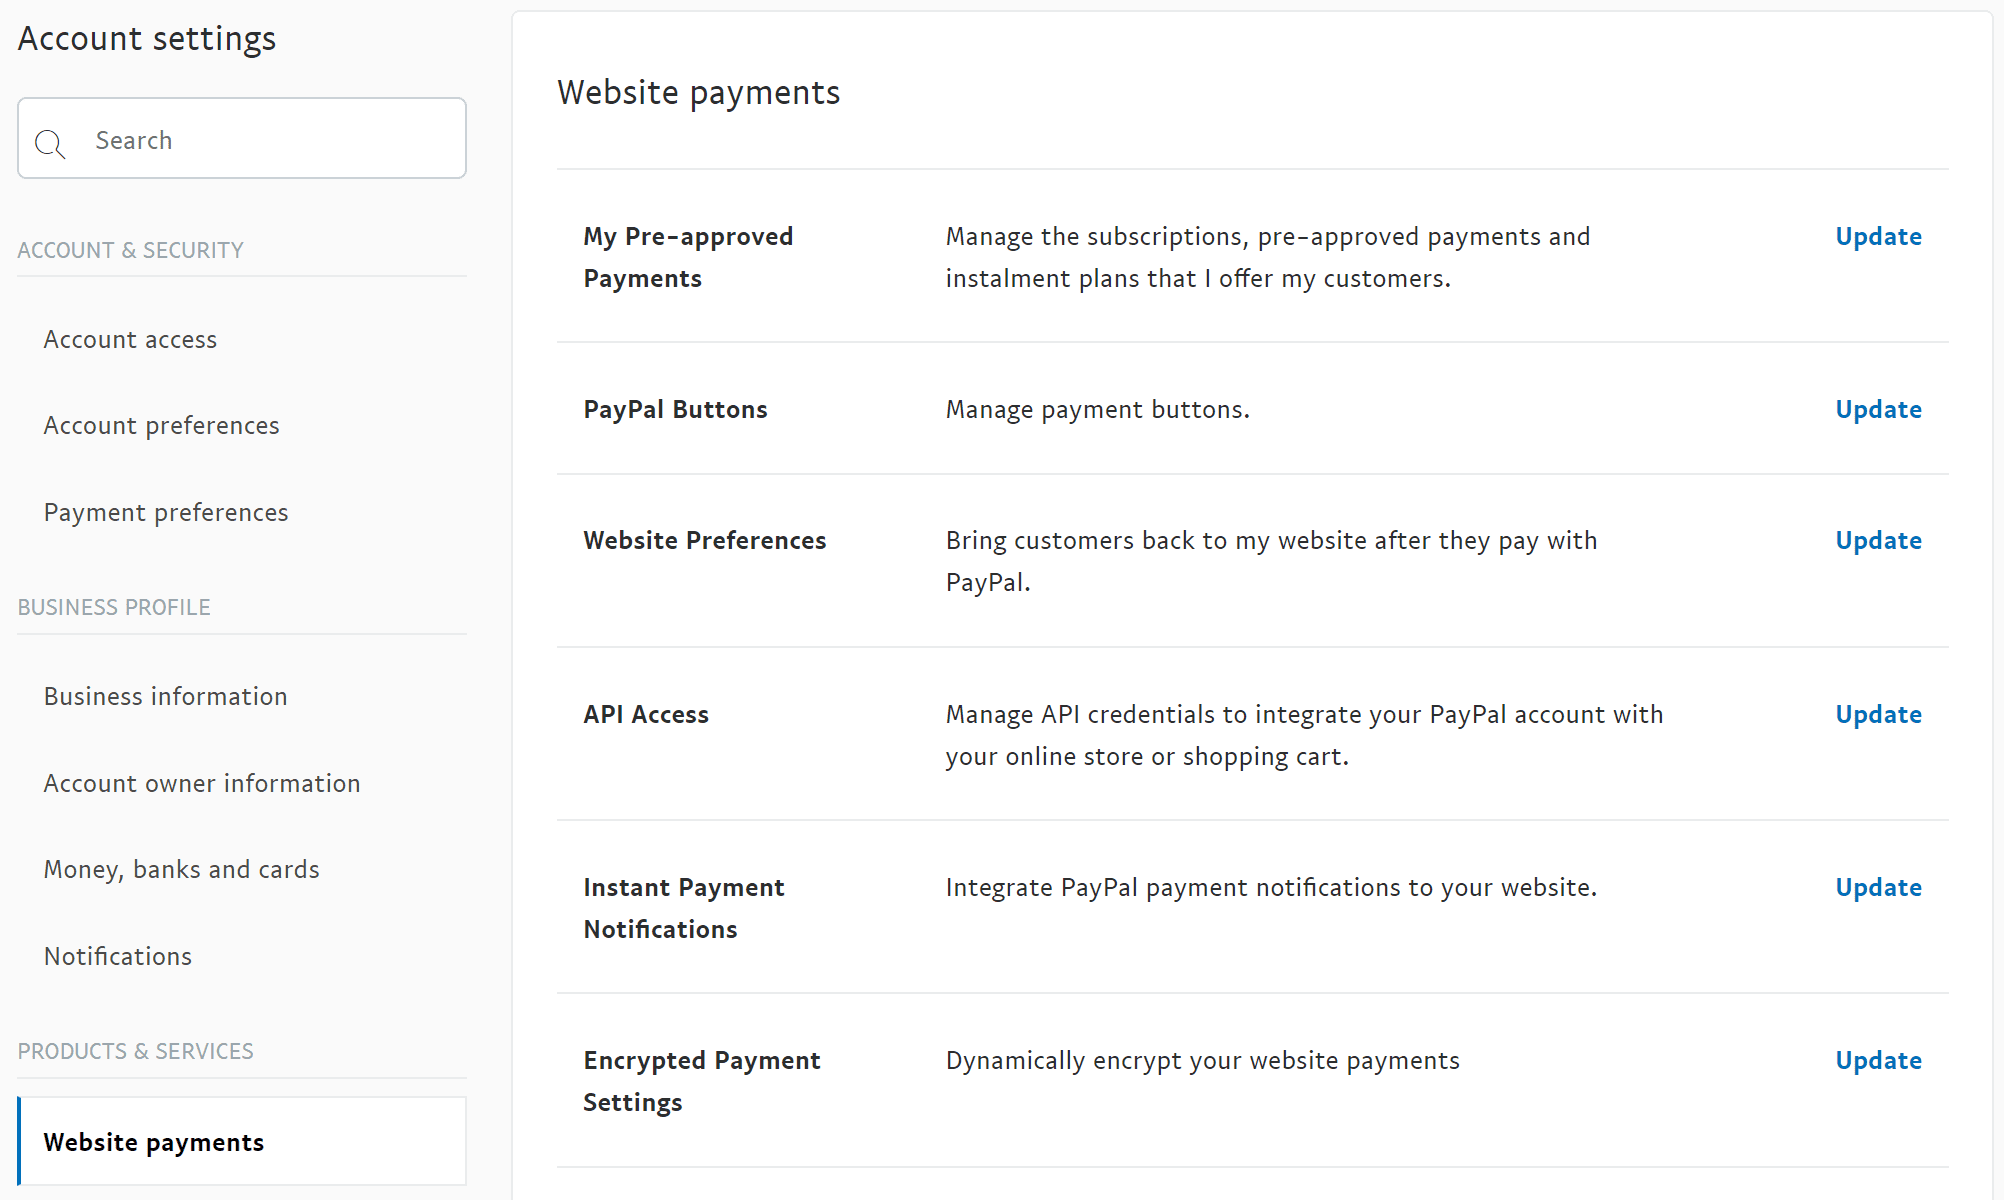
Go to the Account Settings page. Go to Products & Services > Website Payments and select PayPal Buttons (click update to access this section).
Step 8
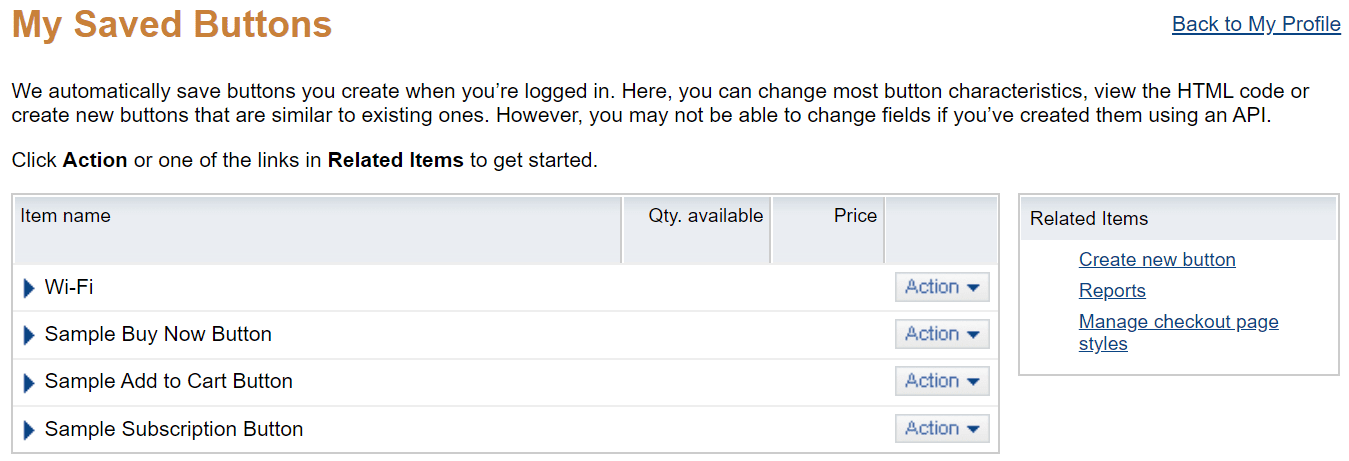
The My Saved Buttons page will open. Create a new PayPal button by selecting the Create new Button link under Related Items.
Step 9
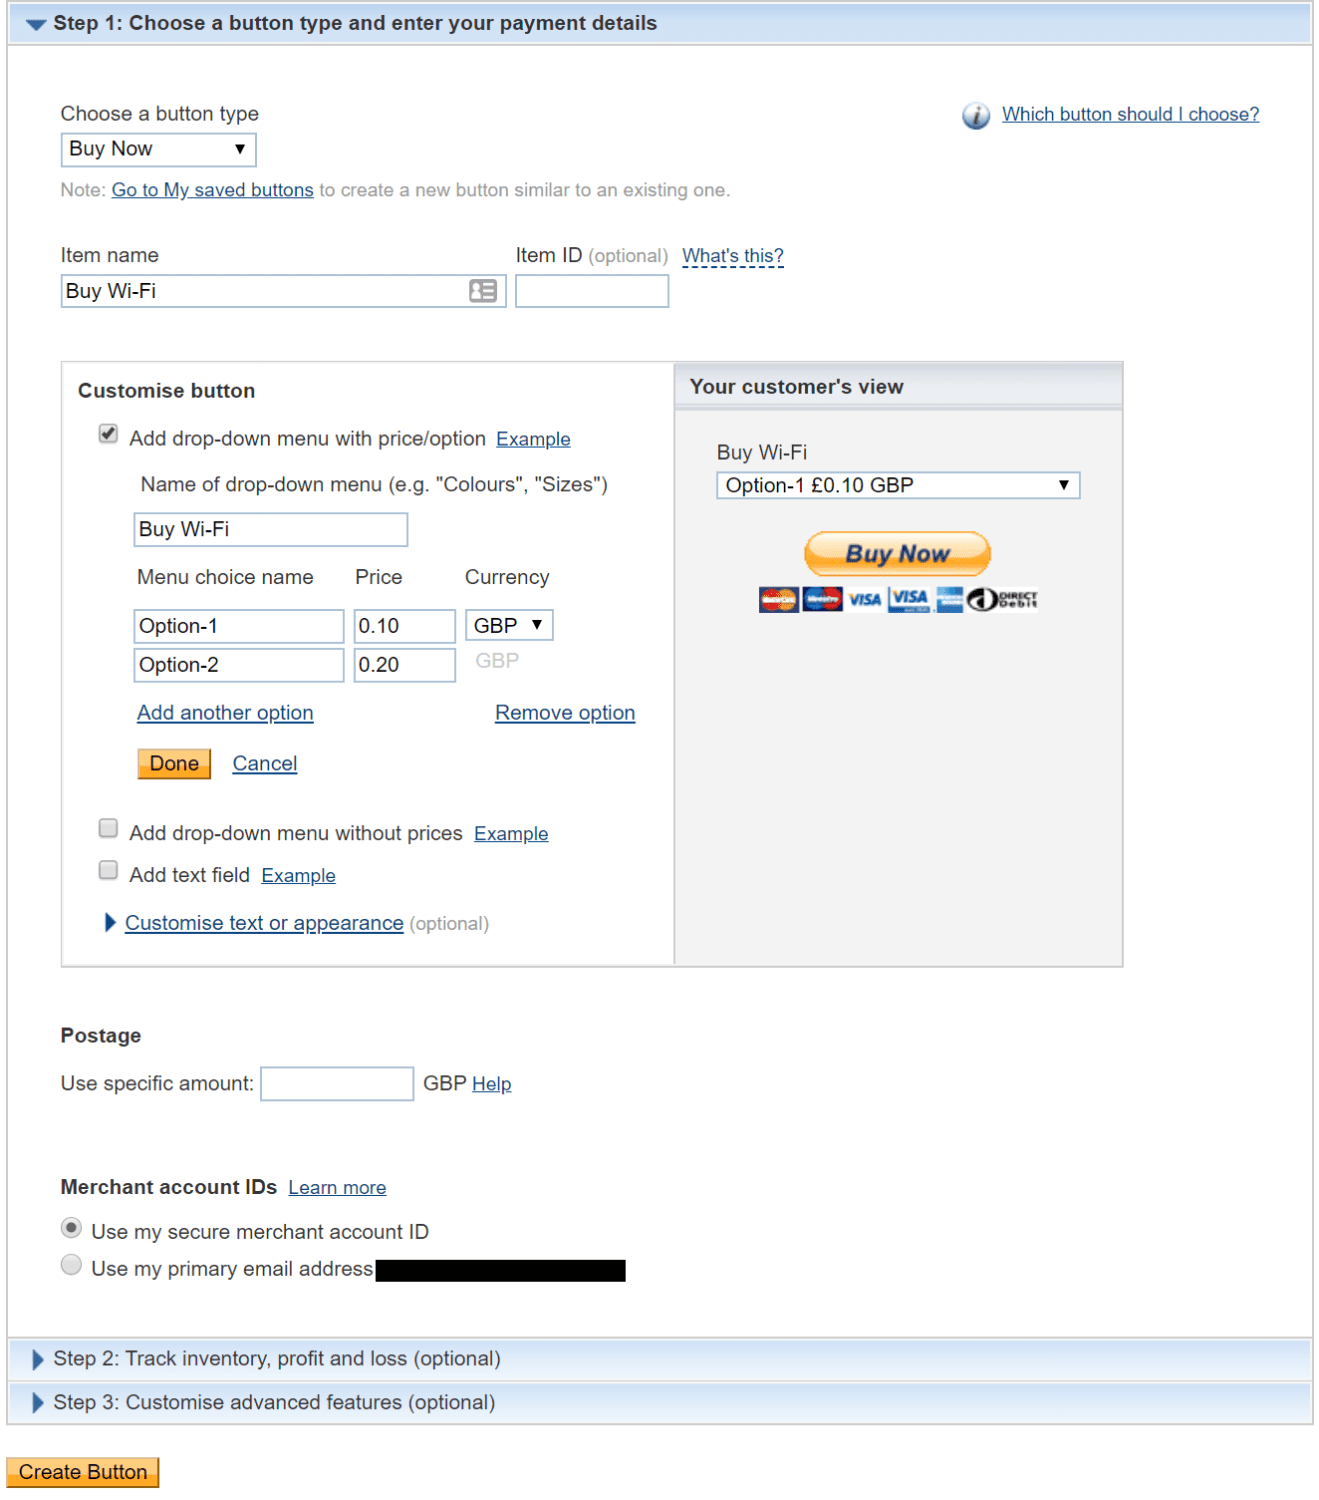
In the button configuration page, configure the following:
- Select Buy Now as the button type.
- For the item name, enter a name (in this instance we have named the item “Buy Wi-Fi”).
- In the Customise Button settings, select the Add drop-down menu with price/option checkbox and create the name of the menu and menu choice options, with price and currency. Click done to save. NOTE: the menu choice MUST match the plan names configured in cnMaestro (step 2) and MUST NOT contain any spaces.
- For the merchant account ID, either use the automatically generated PayPal merchant ID, or the PayPal account’s primary email address. This ID will show on customer’s bank statements.
- Once complete click Create Button.
Step 10
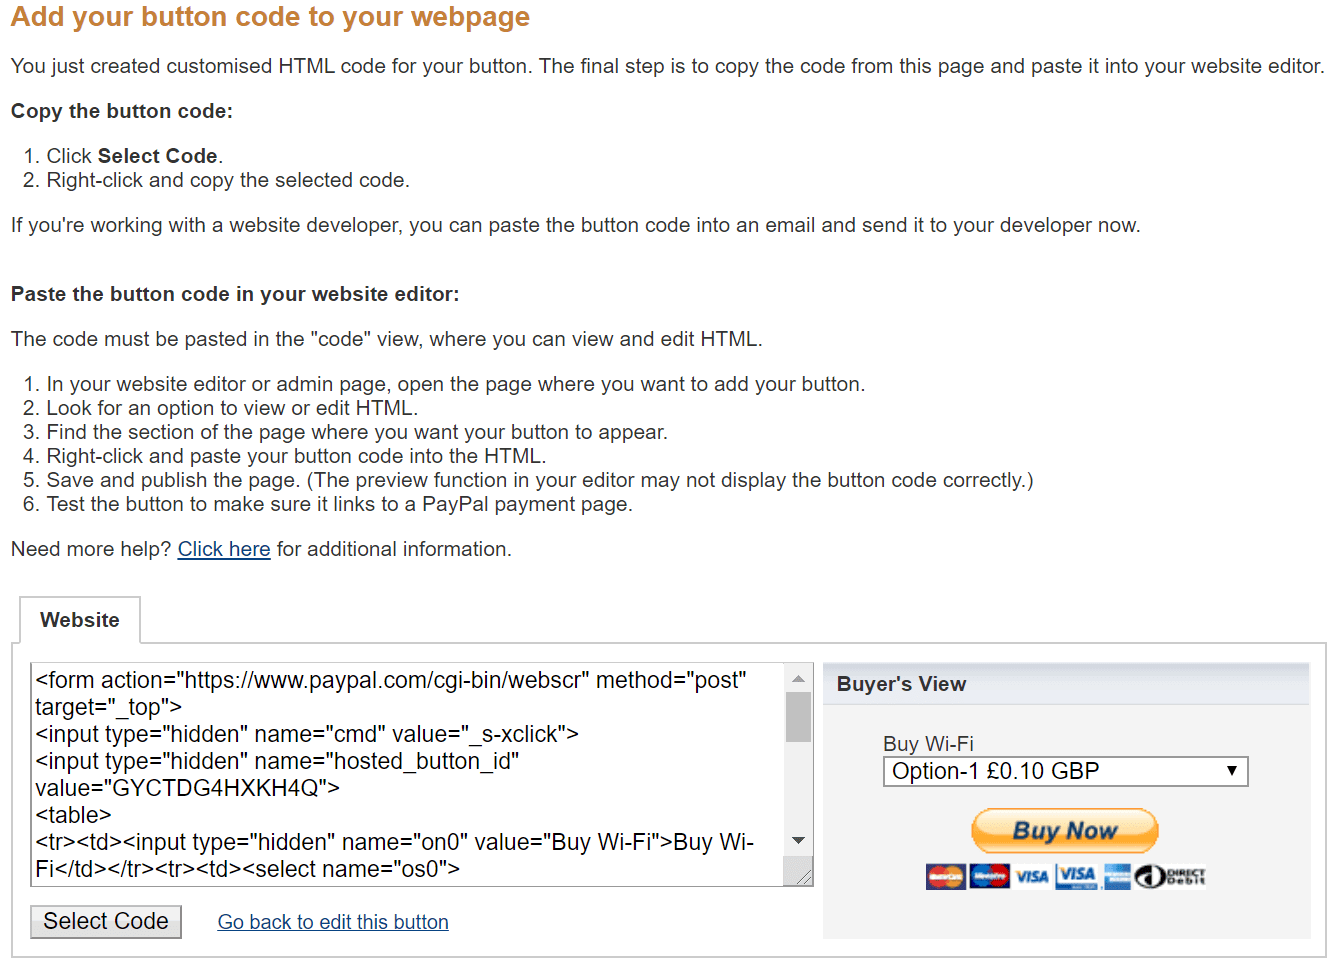
Following creating of the PayPal button, the Button Code page will open. Select, copy and save the button code from the text box. This will be entered into the cnMaestro Guest Access Portal settings later.
Step 11
Back in cnMaestro go to the Guest Access Portal previously configured and go the Access and Paid section. Expand the PayPal Payment Gateway section and enter the PDT Identity Token copied from PayPal in step 6.

Step 12
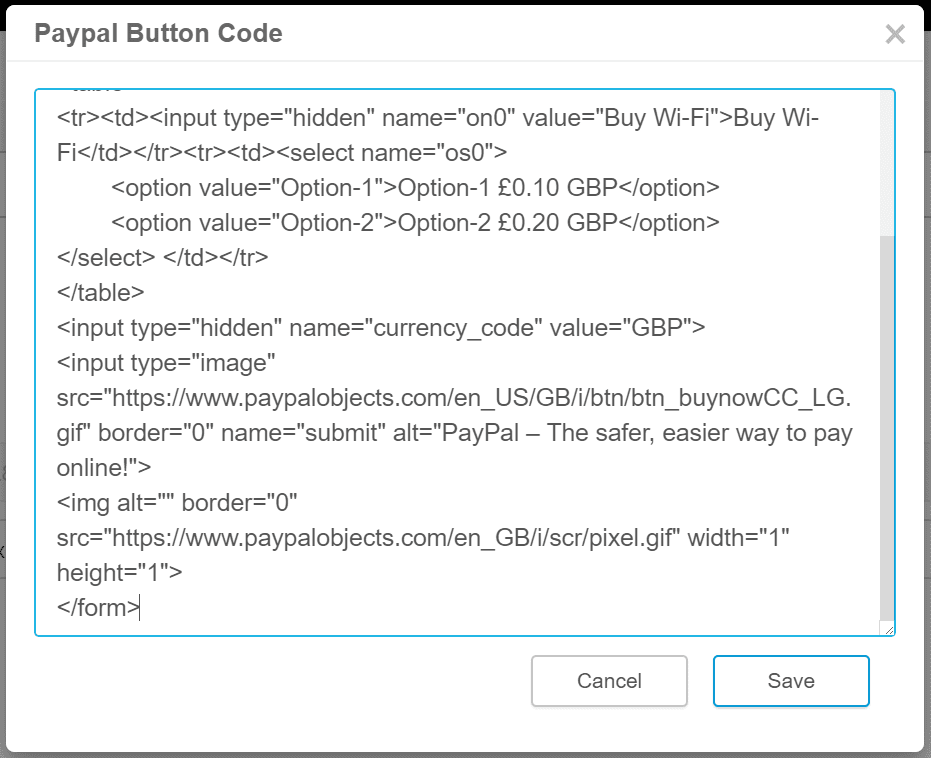
Click the Update Button Code button and enter the PayPal button code copied from PayPal in step 10. Click save.
Step 13
Double check the plan details section and re-enter the plan details if necessary, making sure that the plan names contain no spaces and match the PayPal button configured in PayPal. Click the save button to save the Guest Access Portal configuration.

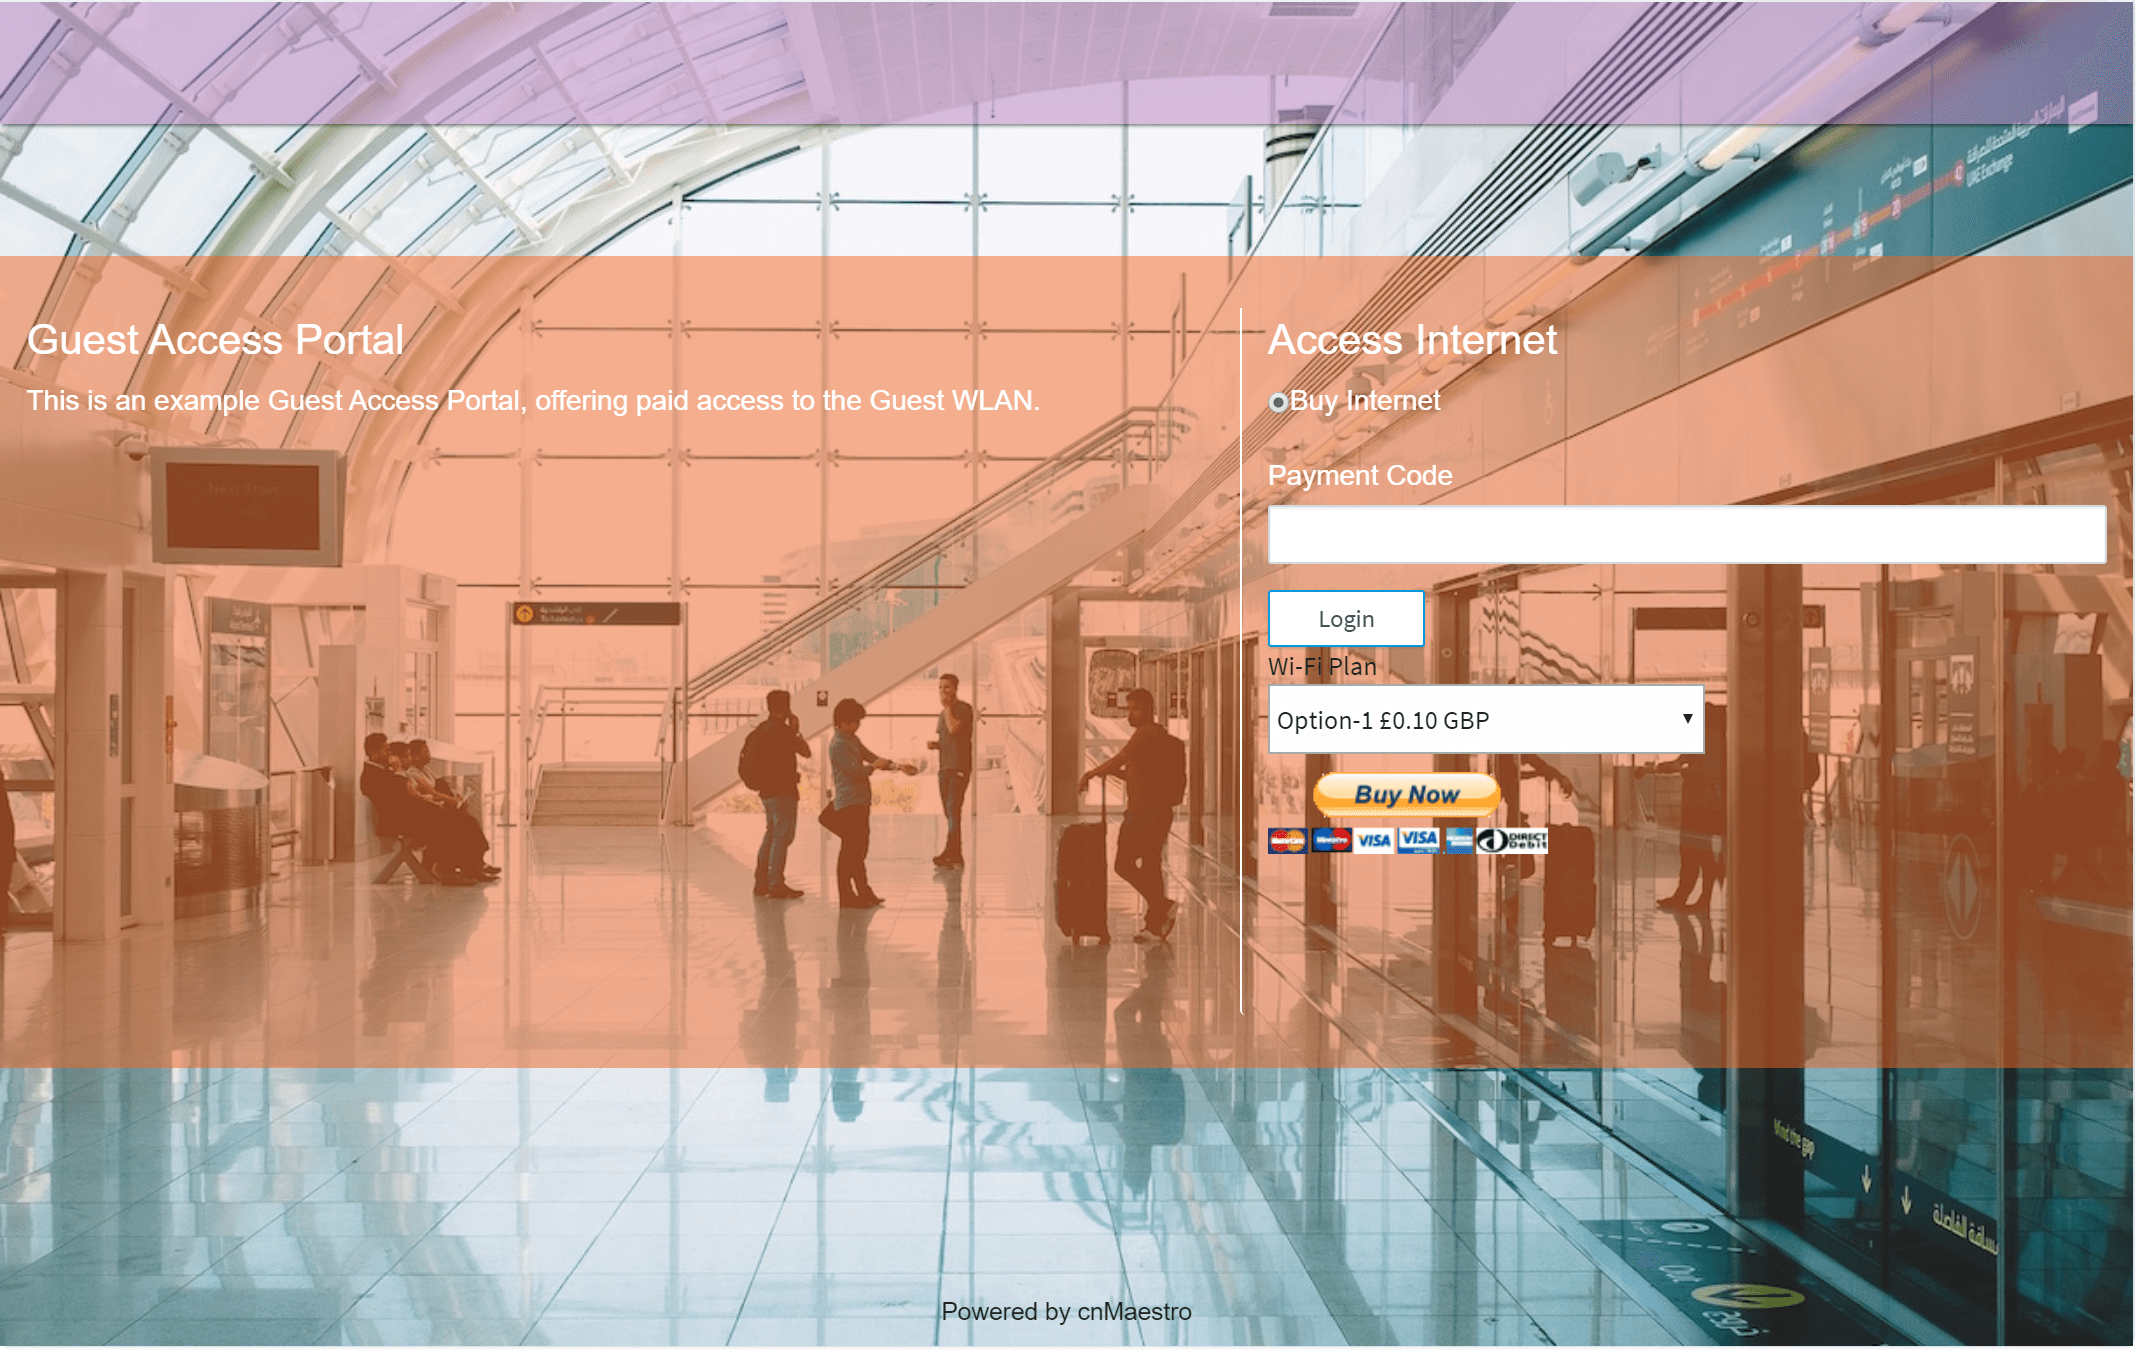
After performing the above configuration steps the Wi-Fi user will be able to join the WLAN via a Guest Access Portal containing PayPal payment options. Below is an example of the Guest Access Portal we have configured:
Author: Harry Drewett (Wireless Solutions Engineer at Purdicom)
We hope you’ve found this post useful and informative. For more information on anything related to cnMaestro, Cambium Networks or configuration, please contact us on +44 (0) 333 1212 100 or email sales@purdi.com