07 Jan 2020 Configuring a Basic PtP Link With 450b Radios

Configuring a Basic PtP Link With 450b Radios
I am often asked about configuring a basic point-to-point wireless link using two 5 GHz unlicensed radios. In my experience, many users are unsure of the configuration required to establish a wireless link – regardless of vendor – and may be apprehensive to configure a link themselves.
However, fear not! In this article, I am going to show you that the process to configure a Cambium Networks 450b 5 GHz PtP link is easier than you may think, with only 4 simple configuration steps required per radio.
FIRSTLY, LET’S CONFIGURE THE MASTER RADIO:
Step 1
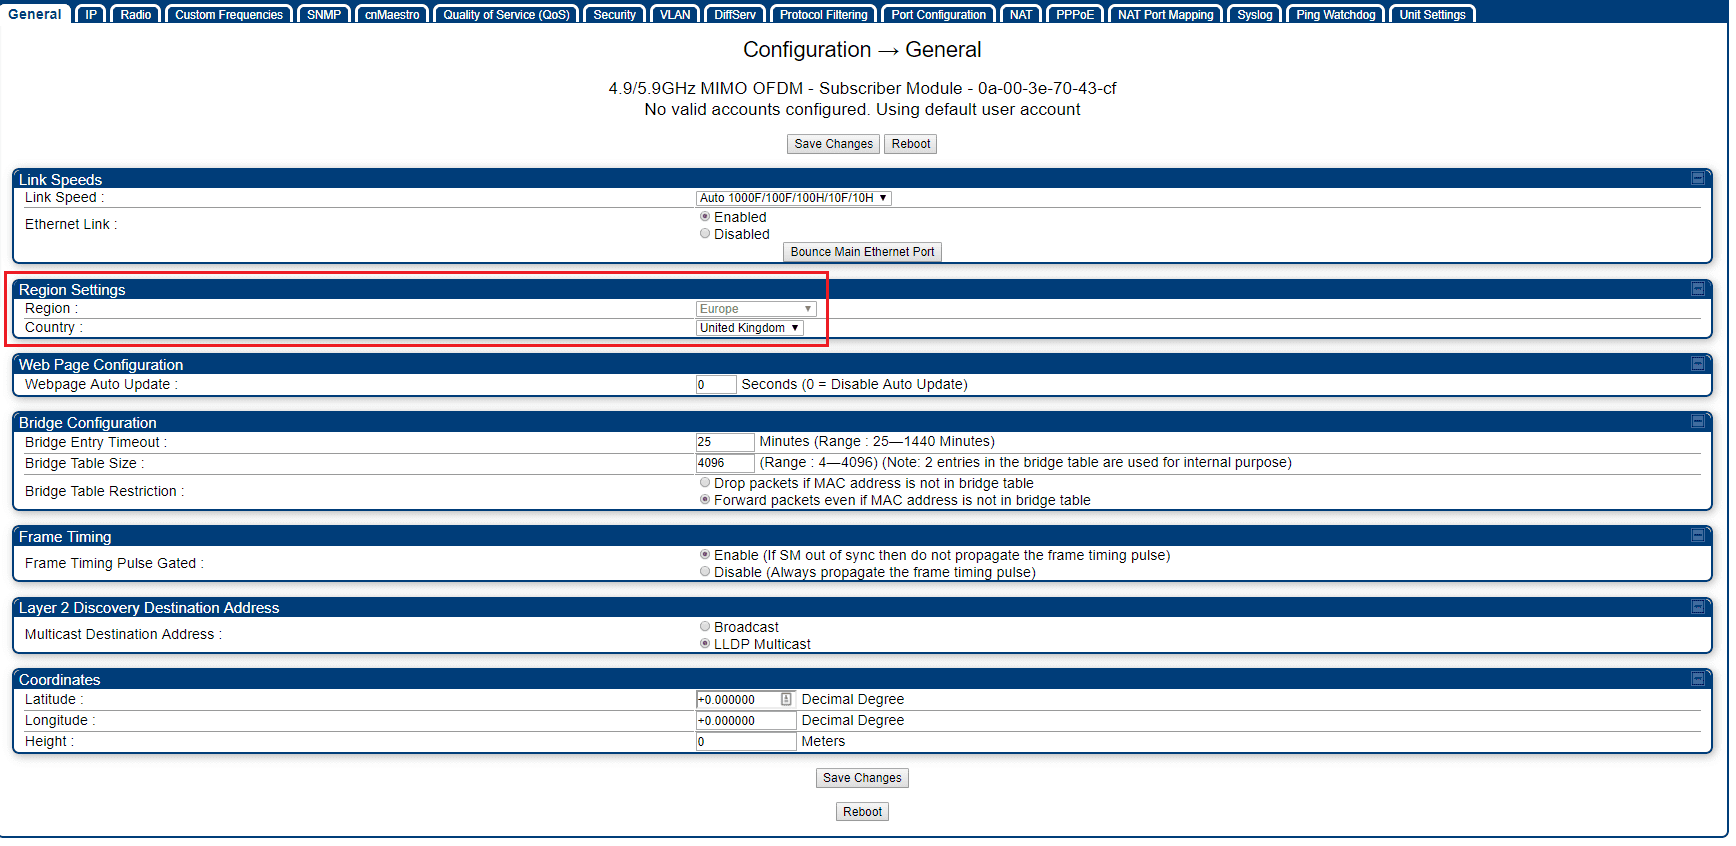
In order to configure the radio, access the web GUI of the radio by using a web browser to browse to the IP address of 169.254.1.1 – this is the default IP address of the Cambium 450 range of radios when new. You will require an IP address in this subnet range on your LAN interface in order to browse to the IP address of the radio. Navigate to the Configuration > General > Region Settings section of the GUI and configure the region and country code for the radio (this should be the same on both master and slave radios):
Step 2
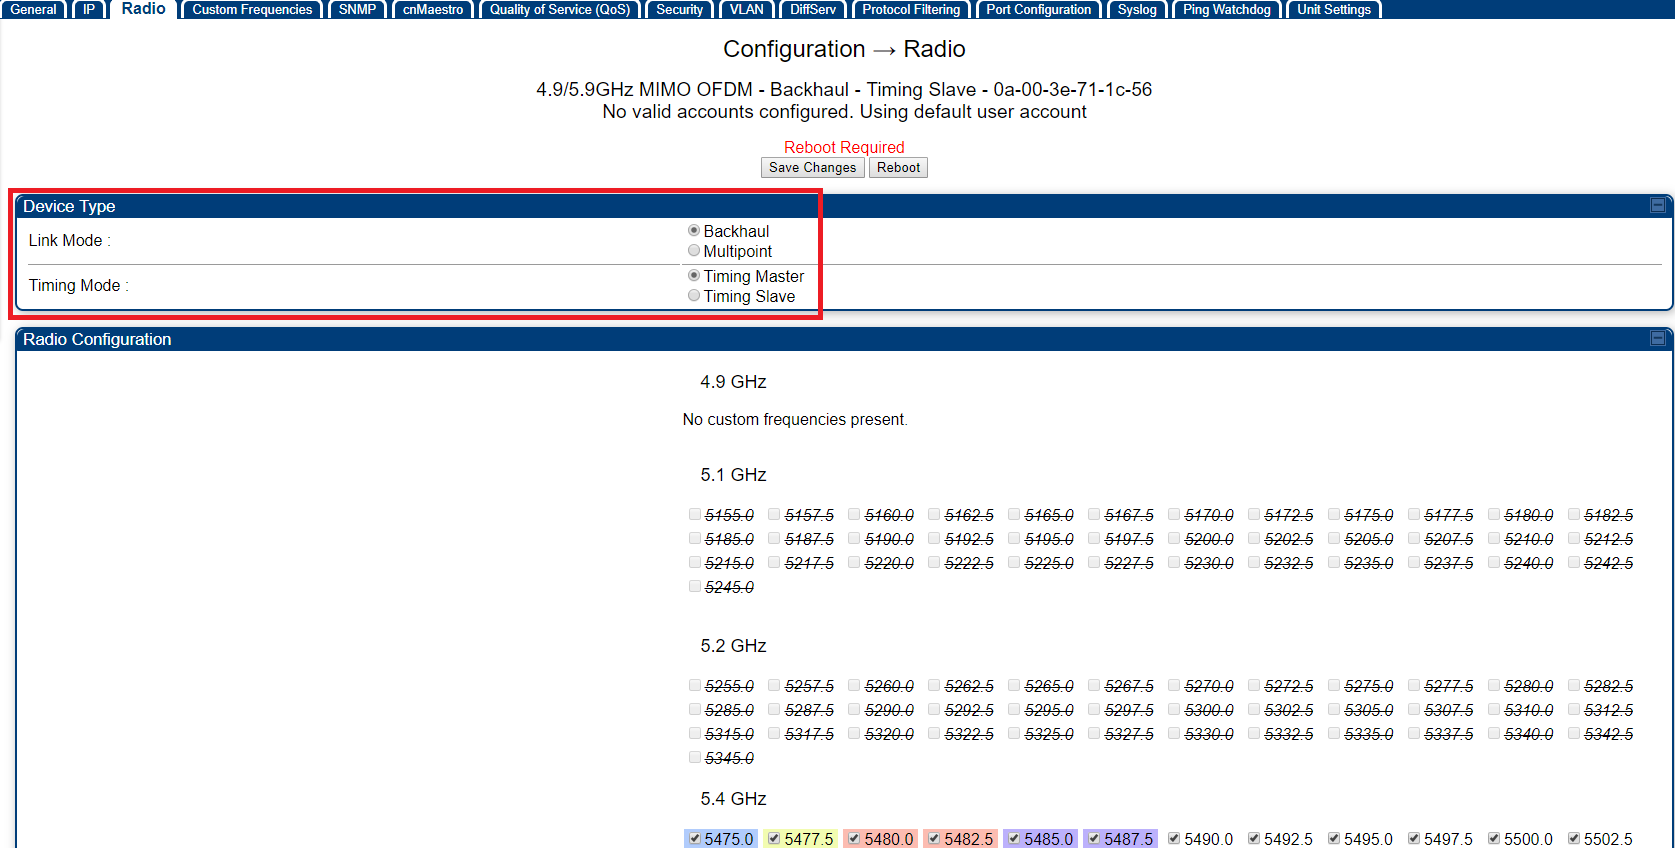
Under Configuration > Radio > Device Type configure the radio for Backhaul Mode – this puts the radio into PtP mode. After saving the changes and rebooting if prompted, configure the radio to be the Timing Master:
Step 3
After performing a reboot configure the desired radio band, operating frequencies, channel width and colour code under Configuration > Radio > Radio Configuration and configure the desired downlink ratio and transmit power under Configuration > Radio > Frame Ratio and Power Control. Make a note of the selected frequencies, channel bandwidth and colour code, as these will need to be entered into the slave radio later.
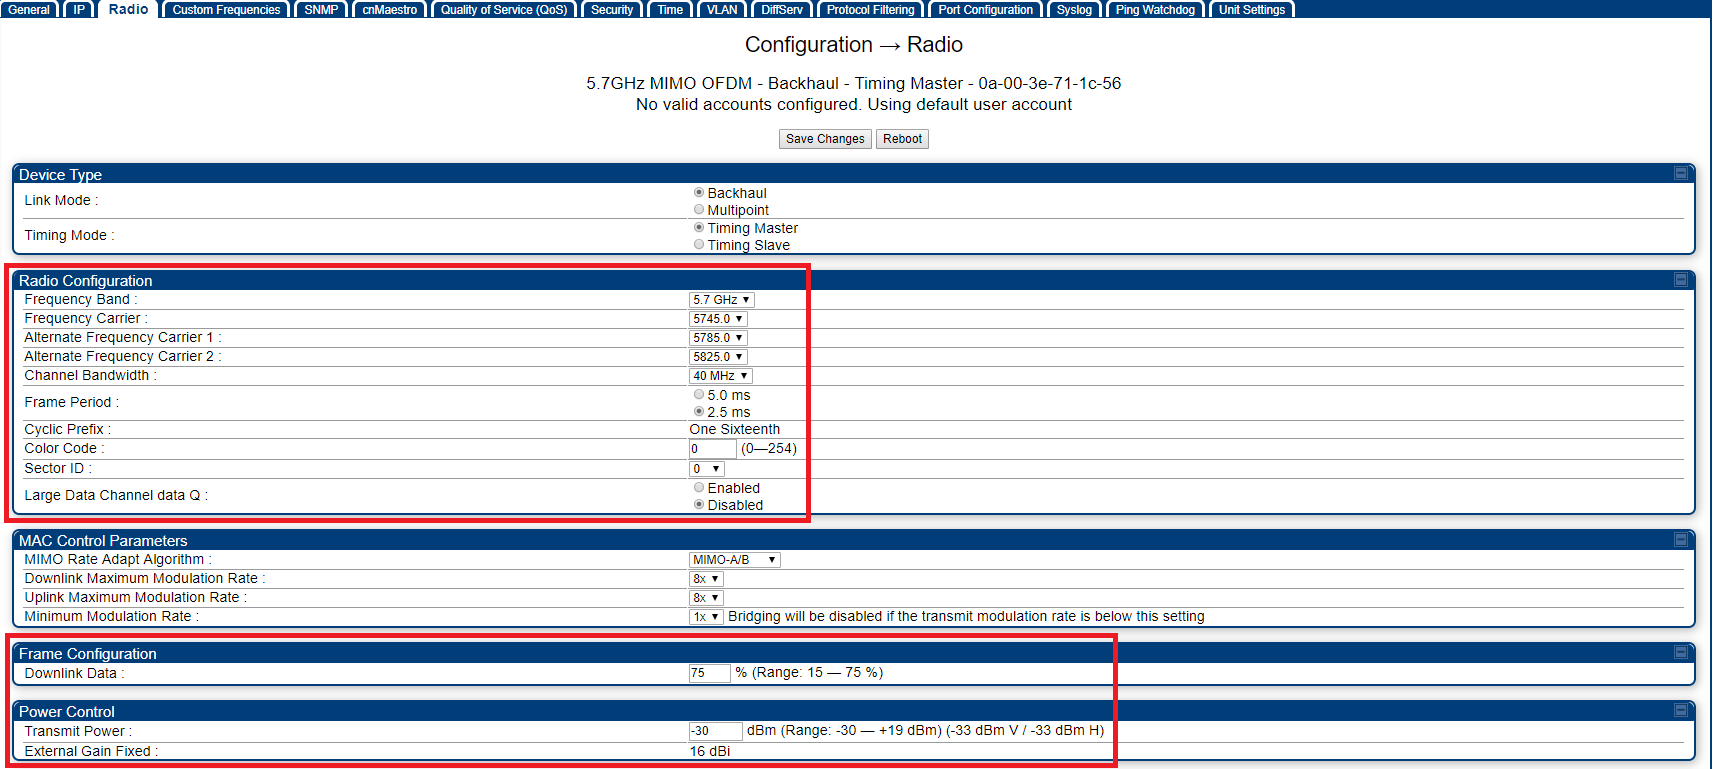
NOTE: The transmit power and frequencies may require adjusting when deploying the link in the field as the RF environment will be different to that of the configuration bench.
Step 4
Under Configuration > IP > LAN1 Network Interface Configuration, configure the desired IP address, subnet mask and default gateway for the radio, or alternatively use DHCP. DNS server IP addresses can also be set here if you are planning to manage the radio via Cambium’s cnMaestro cloud:
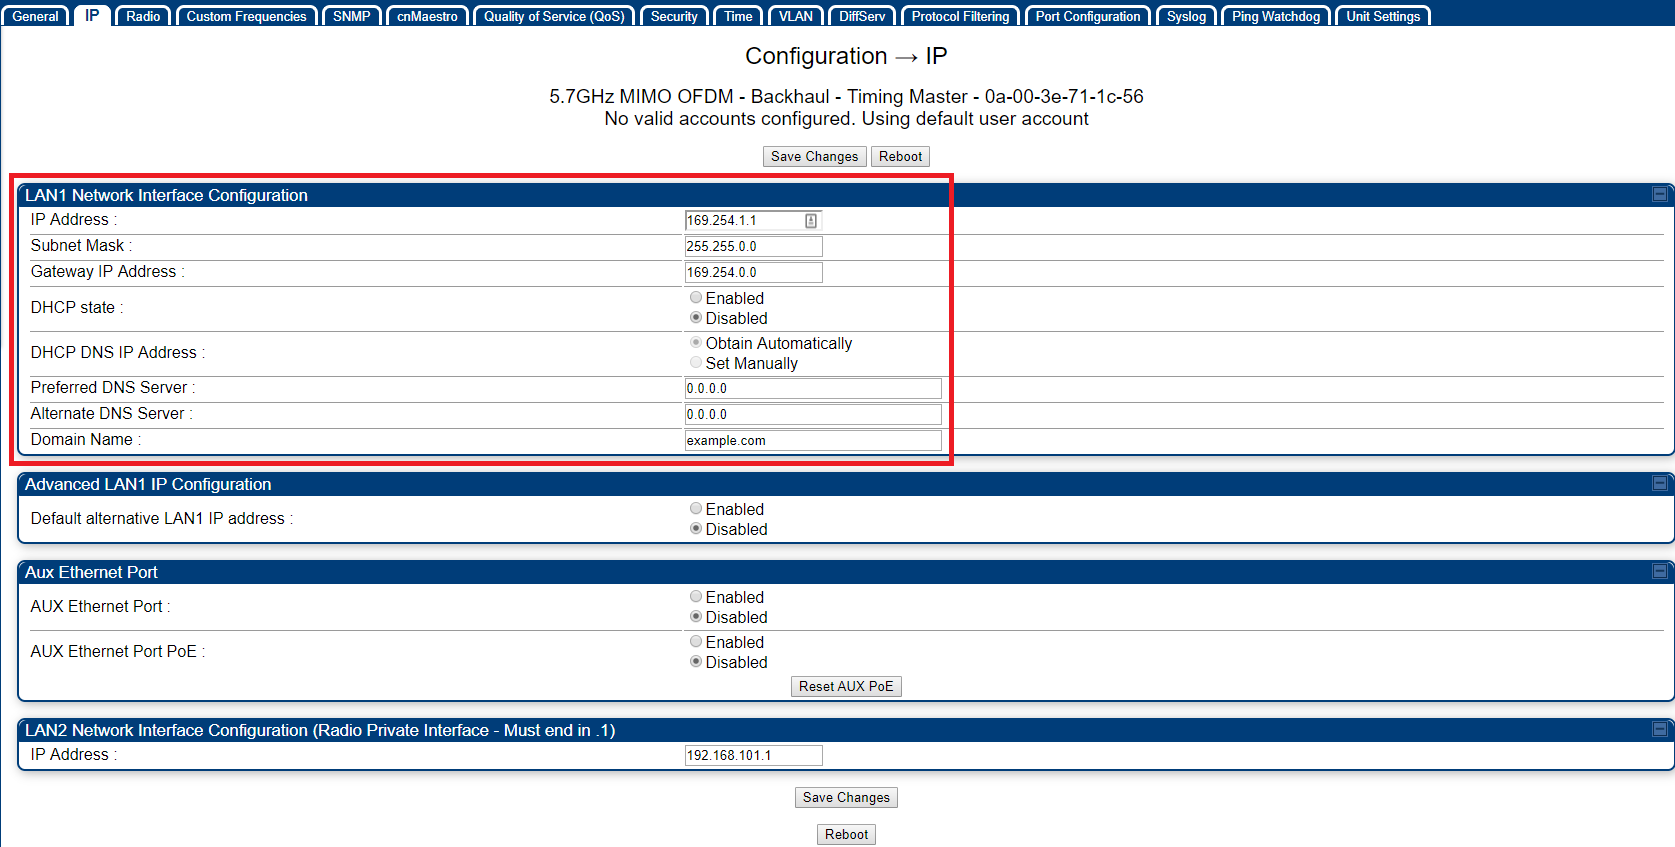
After changing the IP address of the radio, remember to change the IP address on your computer’s LAN interface to an address in the same subnet range as the radio in order to log back in.
NOW THAT THE MASTER RADIO IS CONFIGURED, LET’S CONFIGURE THE SLAVE (OR SUBSCRIBER) RADIO:
Step 1
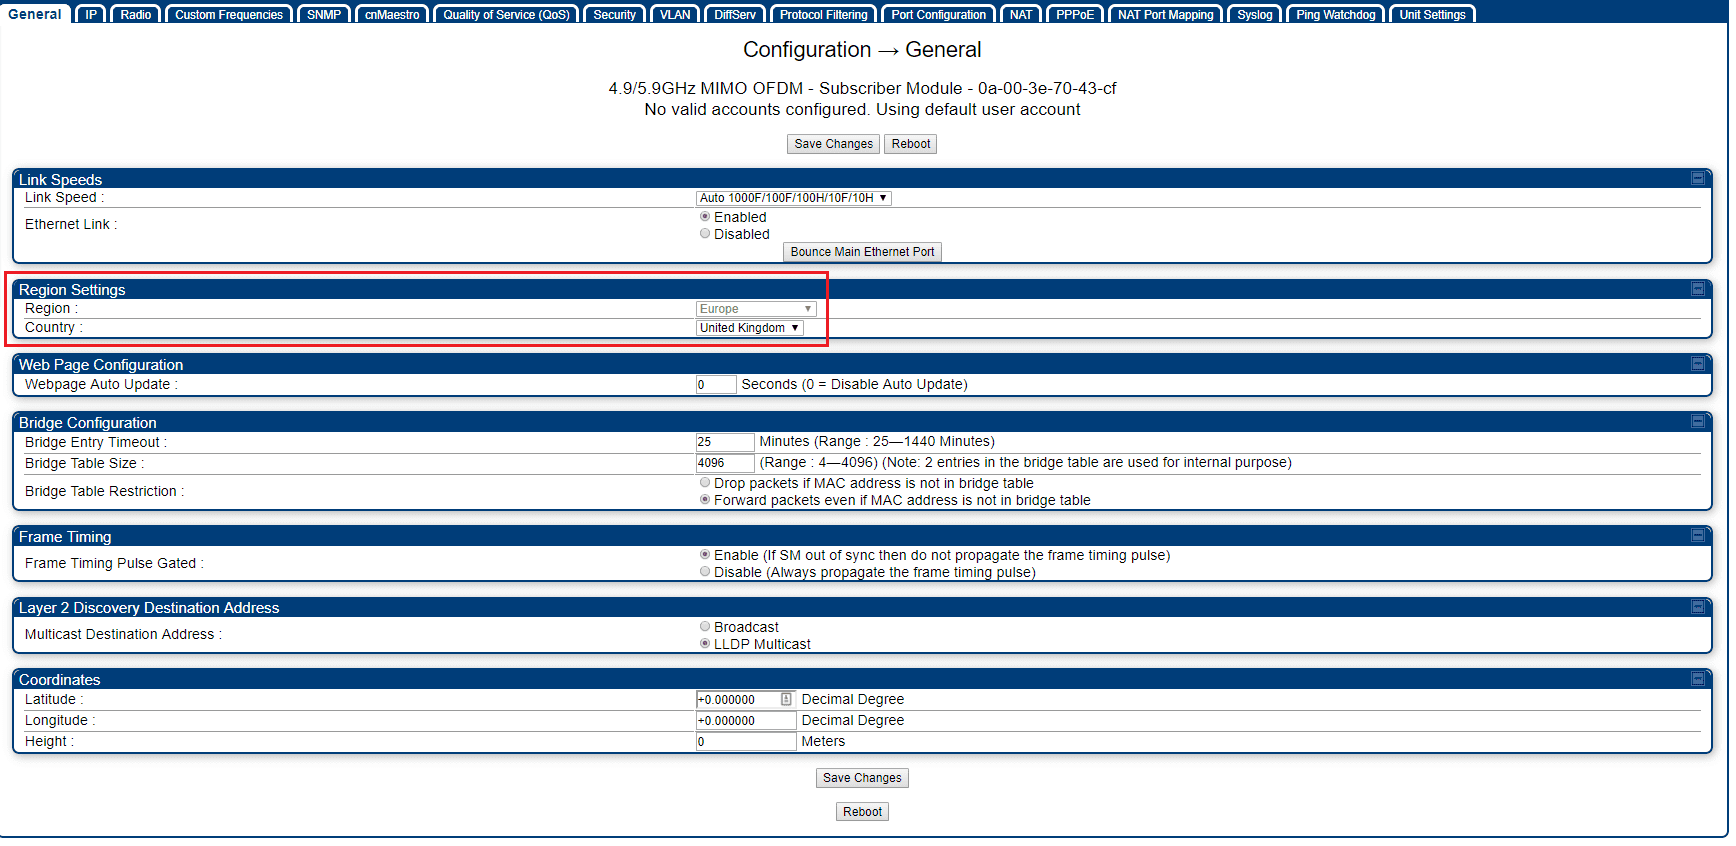
Like step 1 of the master radio configuration, access the web GUI of the slave radio by using a web browser to browse to the default IP address of the radio – 169.254.1.1. Again, the LAN interface of your computer must have an IP address in this same subnet range as the radio. Under the Configuration > General > Region Settings section configure the region and country code (this should be the same as previously configured on the master radio):
Step 2
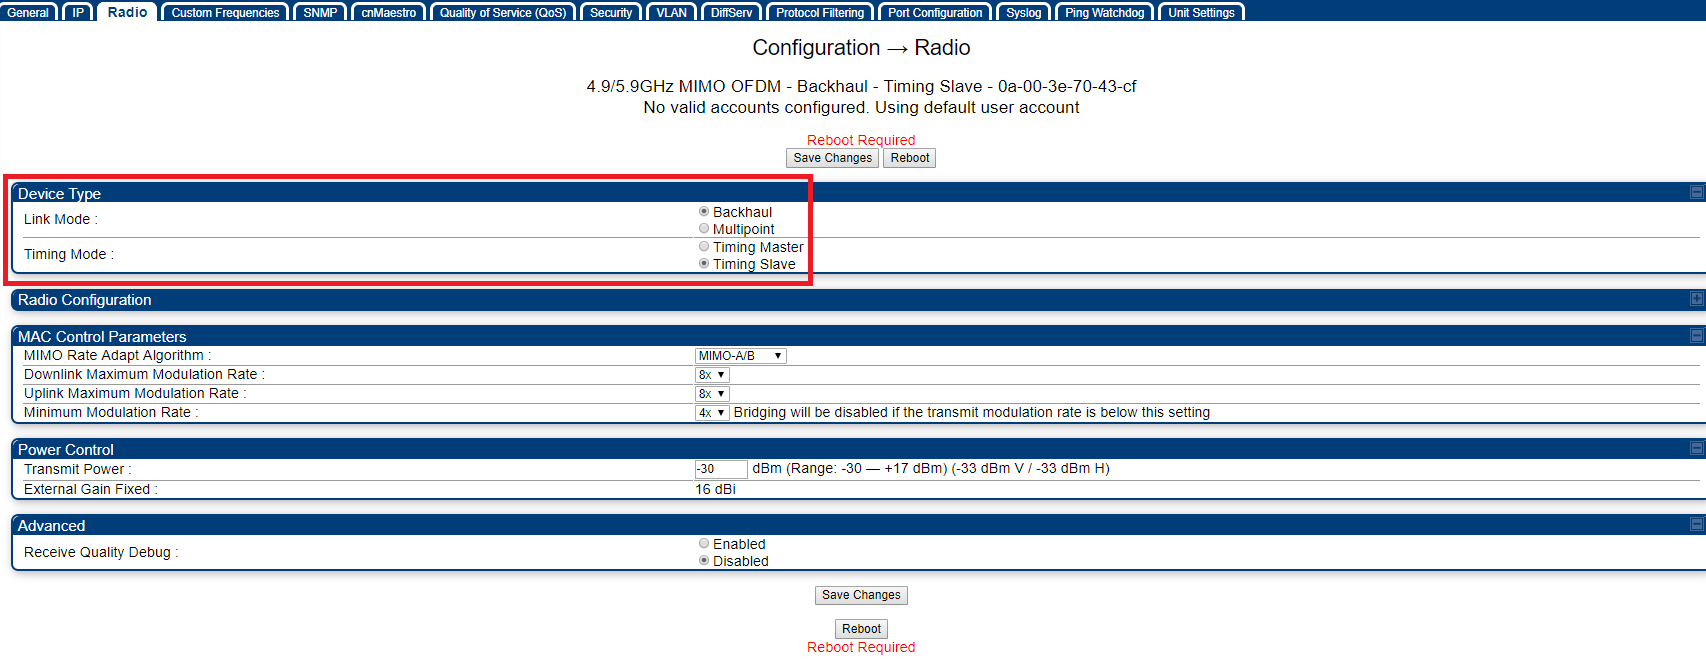
Under Configuration > Radio > Device Type configure the radio for Backhaul Mode. After saving the changes, configure the radio to be the Timing Slave. If prompted, reboot the radio:
Step 3
Under Configuration > Radio > Radio Configuration select the frequencies, channel width and colour code to be used for operation – these settings must match the frequencies and channel width configured on the master radio (previously configured in step 3 of the master radio configuration):
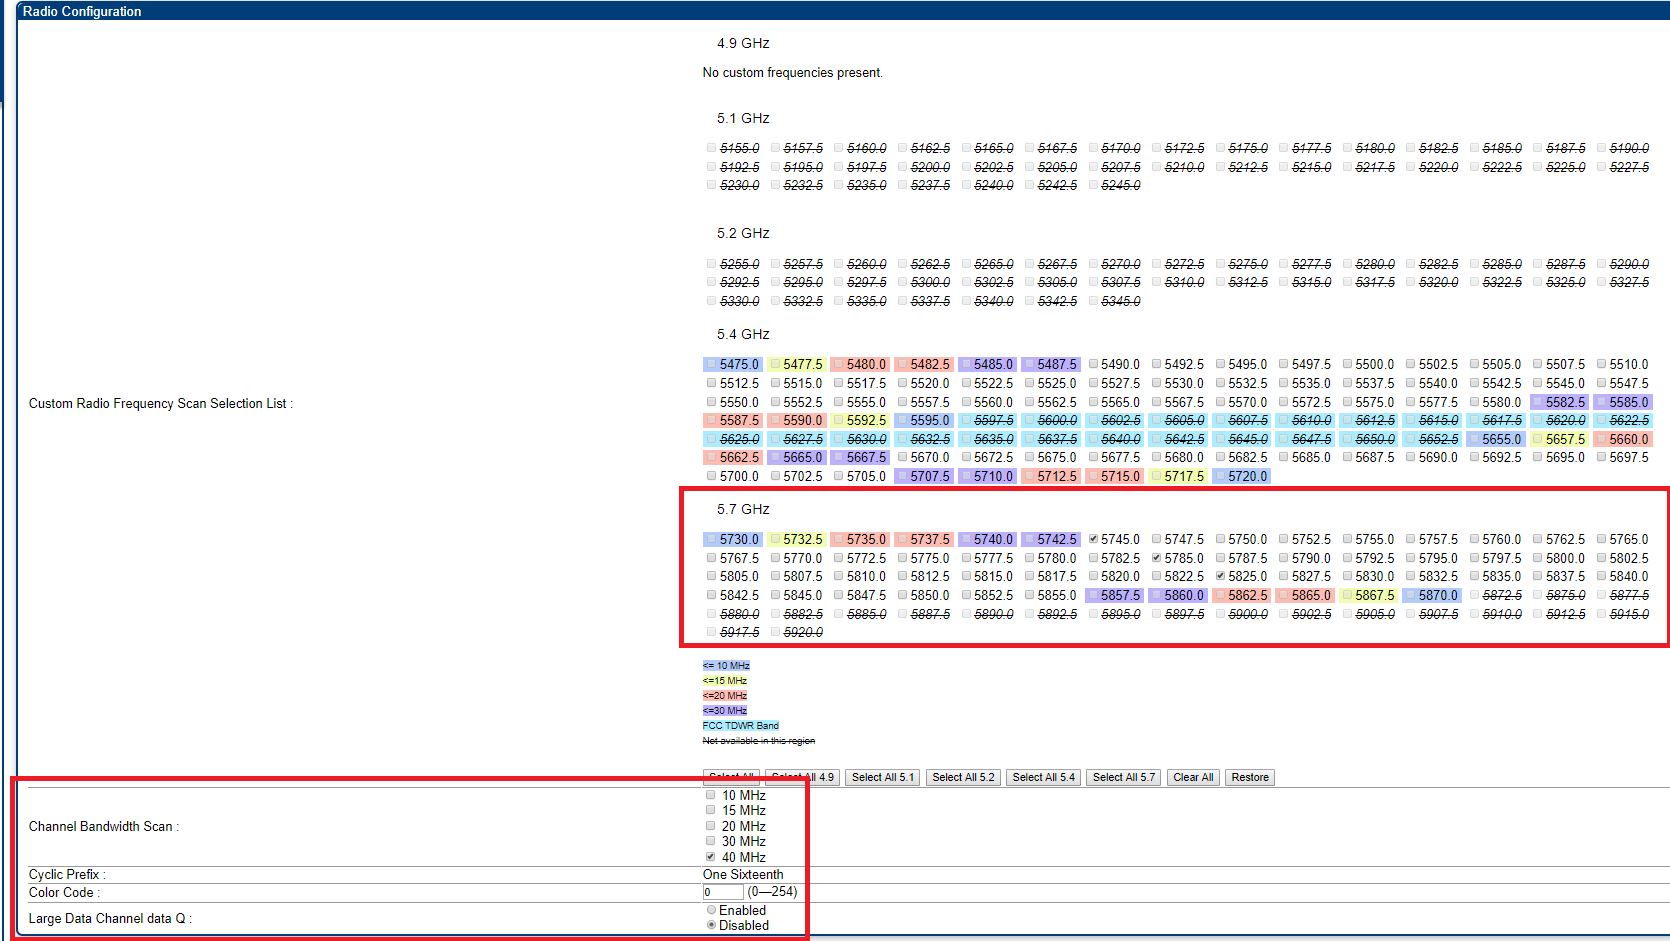
Configure the desired transmit power under Configuration > Radio > Power Control – ideally, this should be identical to the transmit power on the master radio in order to achieve optimal RSSI on each radio when aligned:

Step 4
Under Configuration,> IP > LAN1 Network Interface Configuration configure the desired IP address, subnet mask, and default gateway for the radio. DNS server IP addresses can also be set here. Alternatively, DHCP can be used:
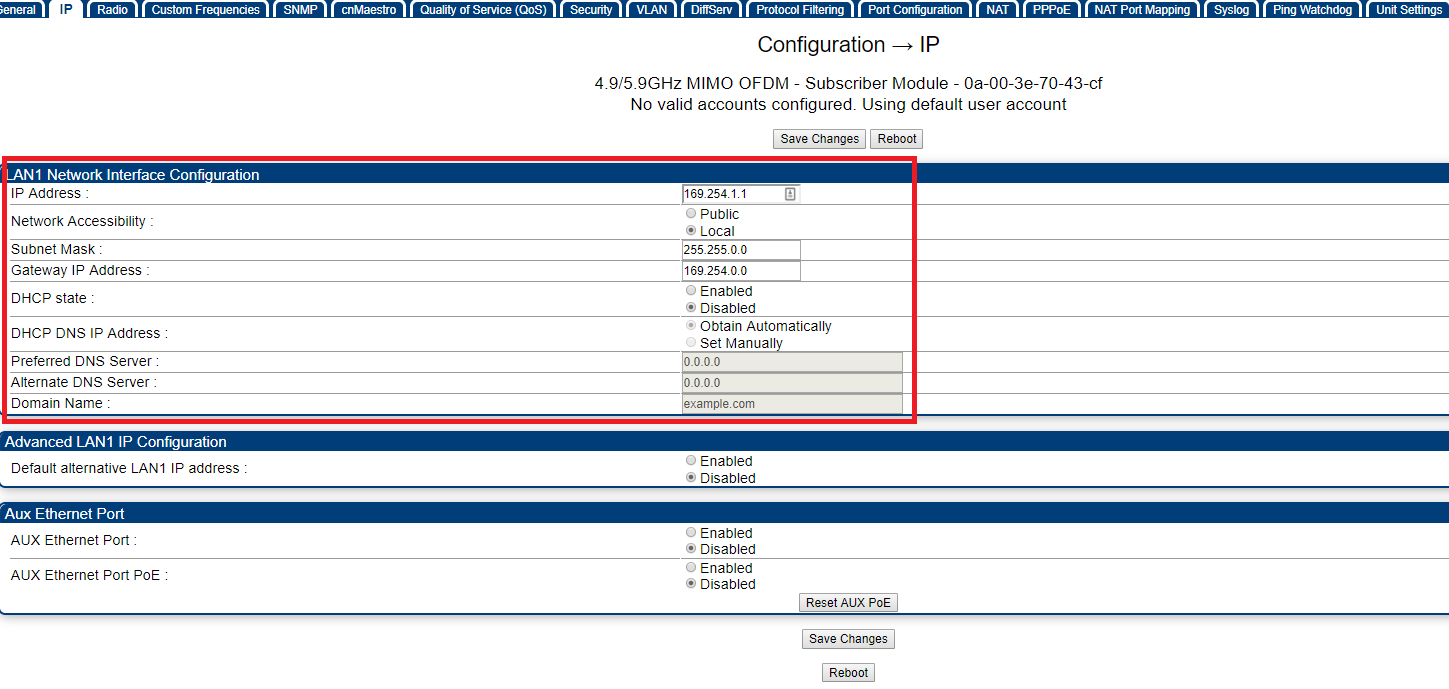
After changing the IP address of the radio, remember to change the IP address on your computer’s LAN interface to an address in the same subnet range in order to log back into the radio.
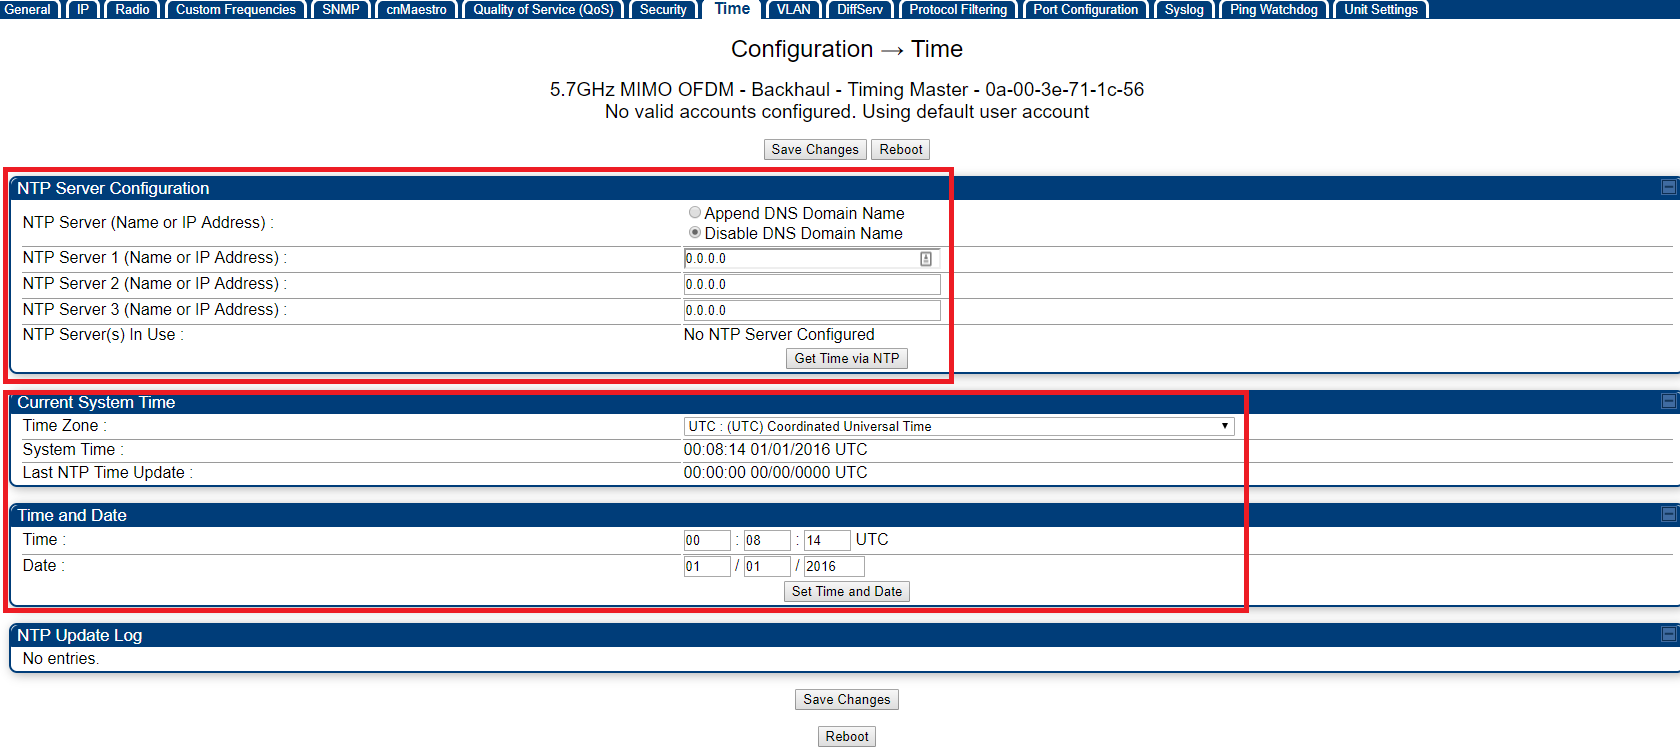
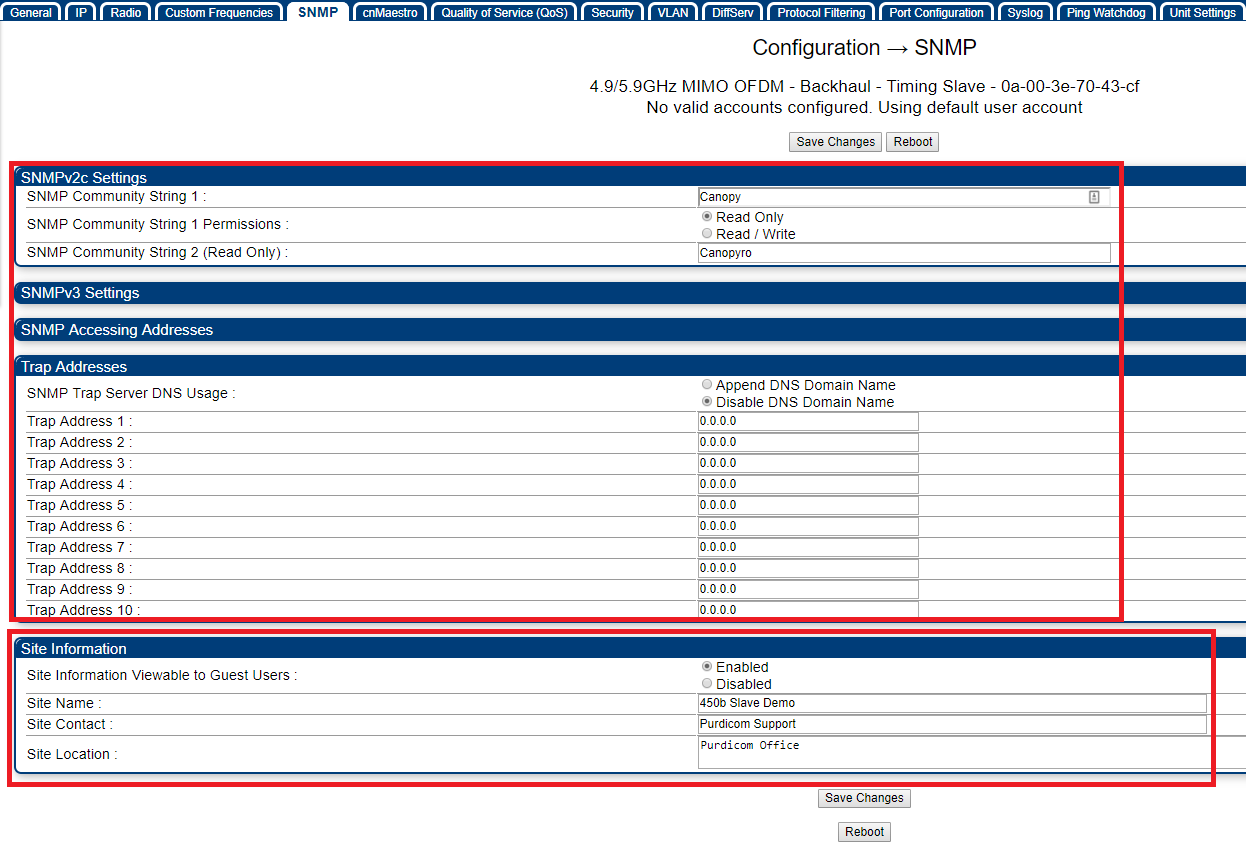
The configuration steps detailed above are the minimum required in order to establish a wireless link. However, there are further configuration options such as setting NTP servers/date & time settings, SNMP server IP addresses, and radio system names that I would also recommend configuring for ease of management and troubleshooting. These can be found in the following areas in the GUI of each radio:
Configuration > Time
Configuration > SNMP
VERIFY THE LINK HAS ESTABLISHED:
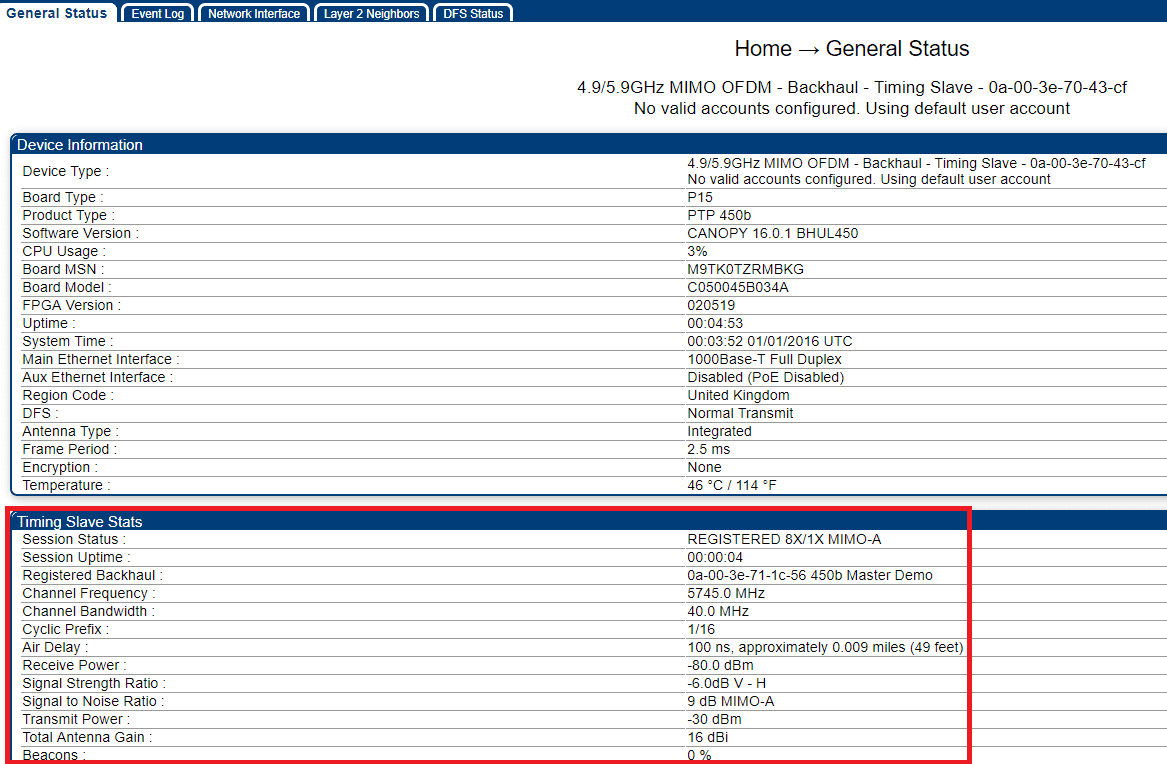
Now that both radios are configured, let’s verify the status of the wireless link. If a reboot is required following a configuration save, reboot each radio (you will be prompted). Following this, navigate to the Home > General Status > Timing Slave Stats screen in the GUI of the slave radio. If the wireless link is up, the Timing Slave Stats section should show information such as session status, operating frequency, and receive power (see below):
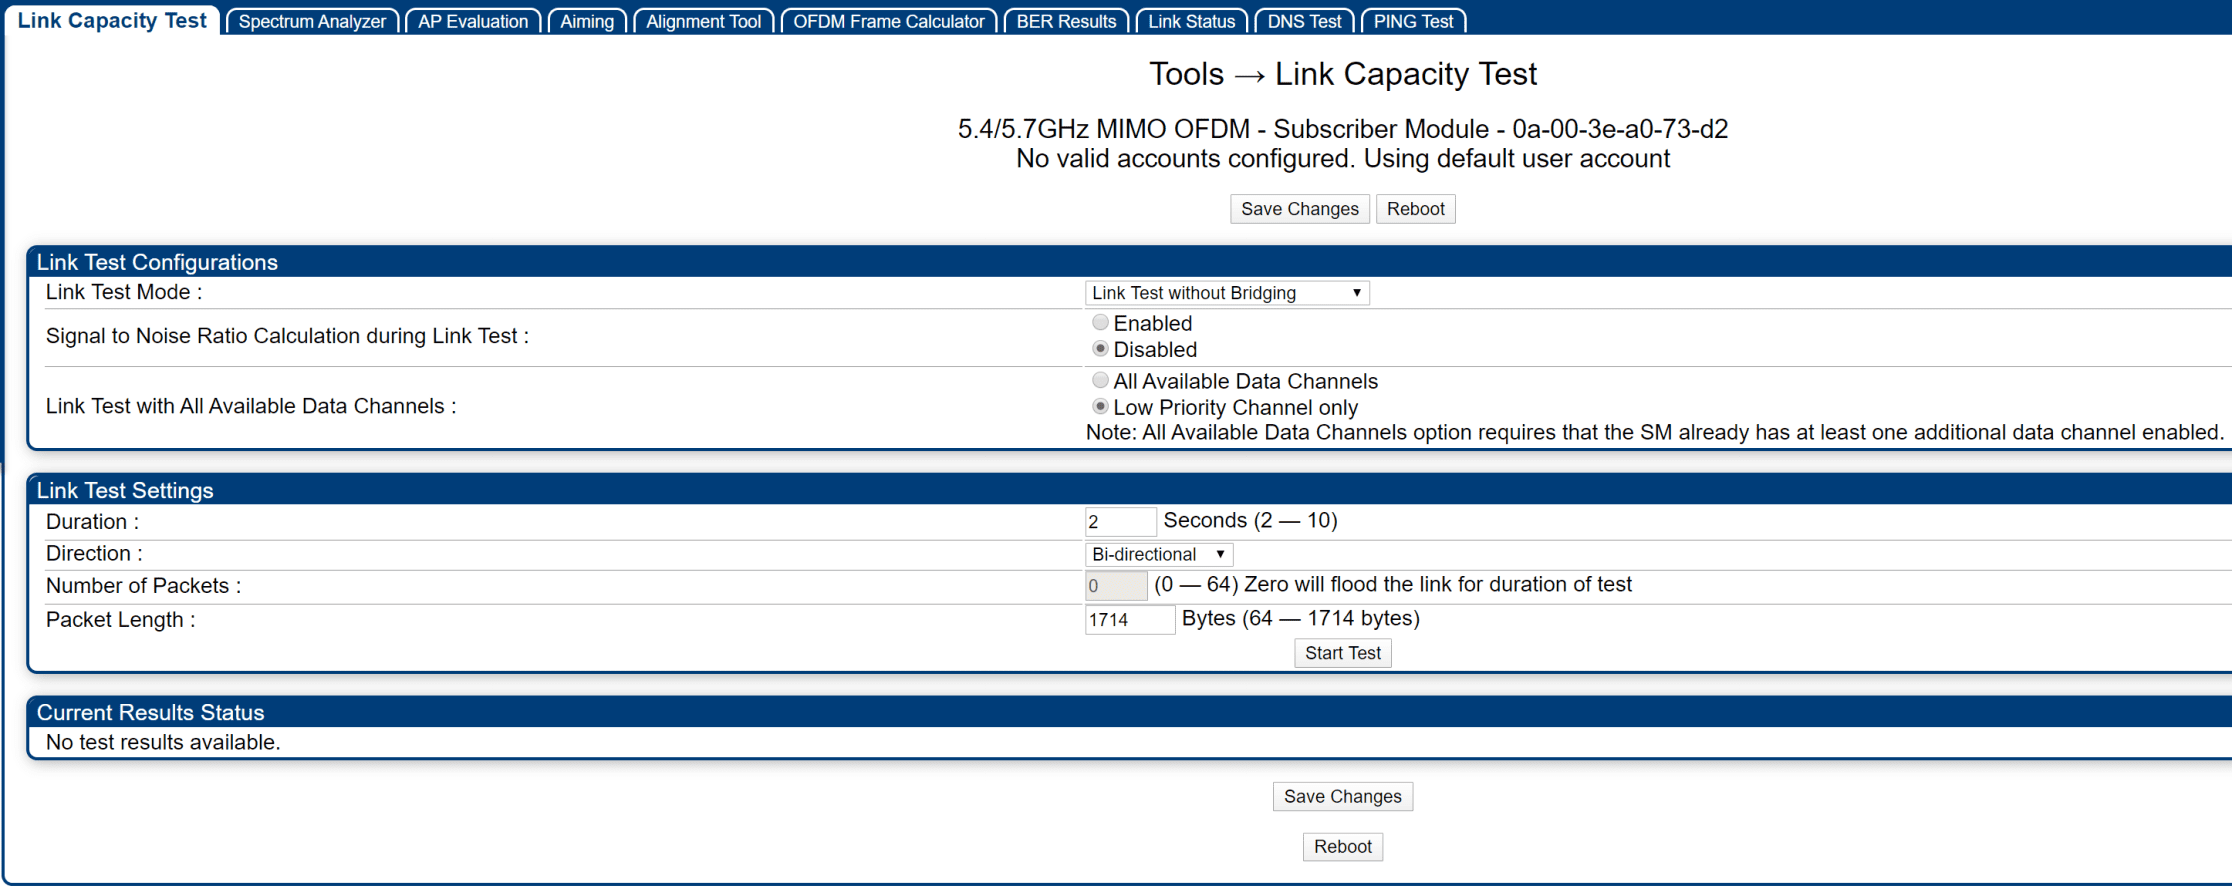
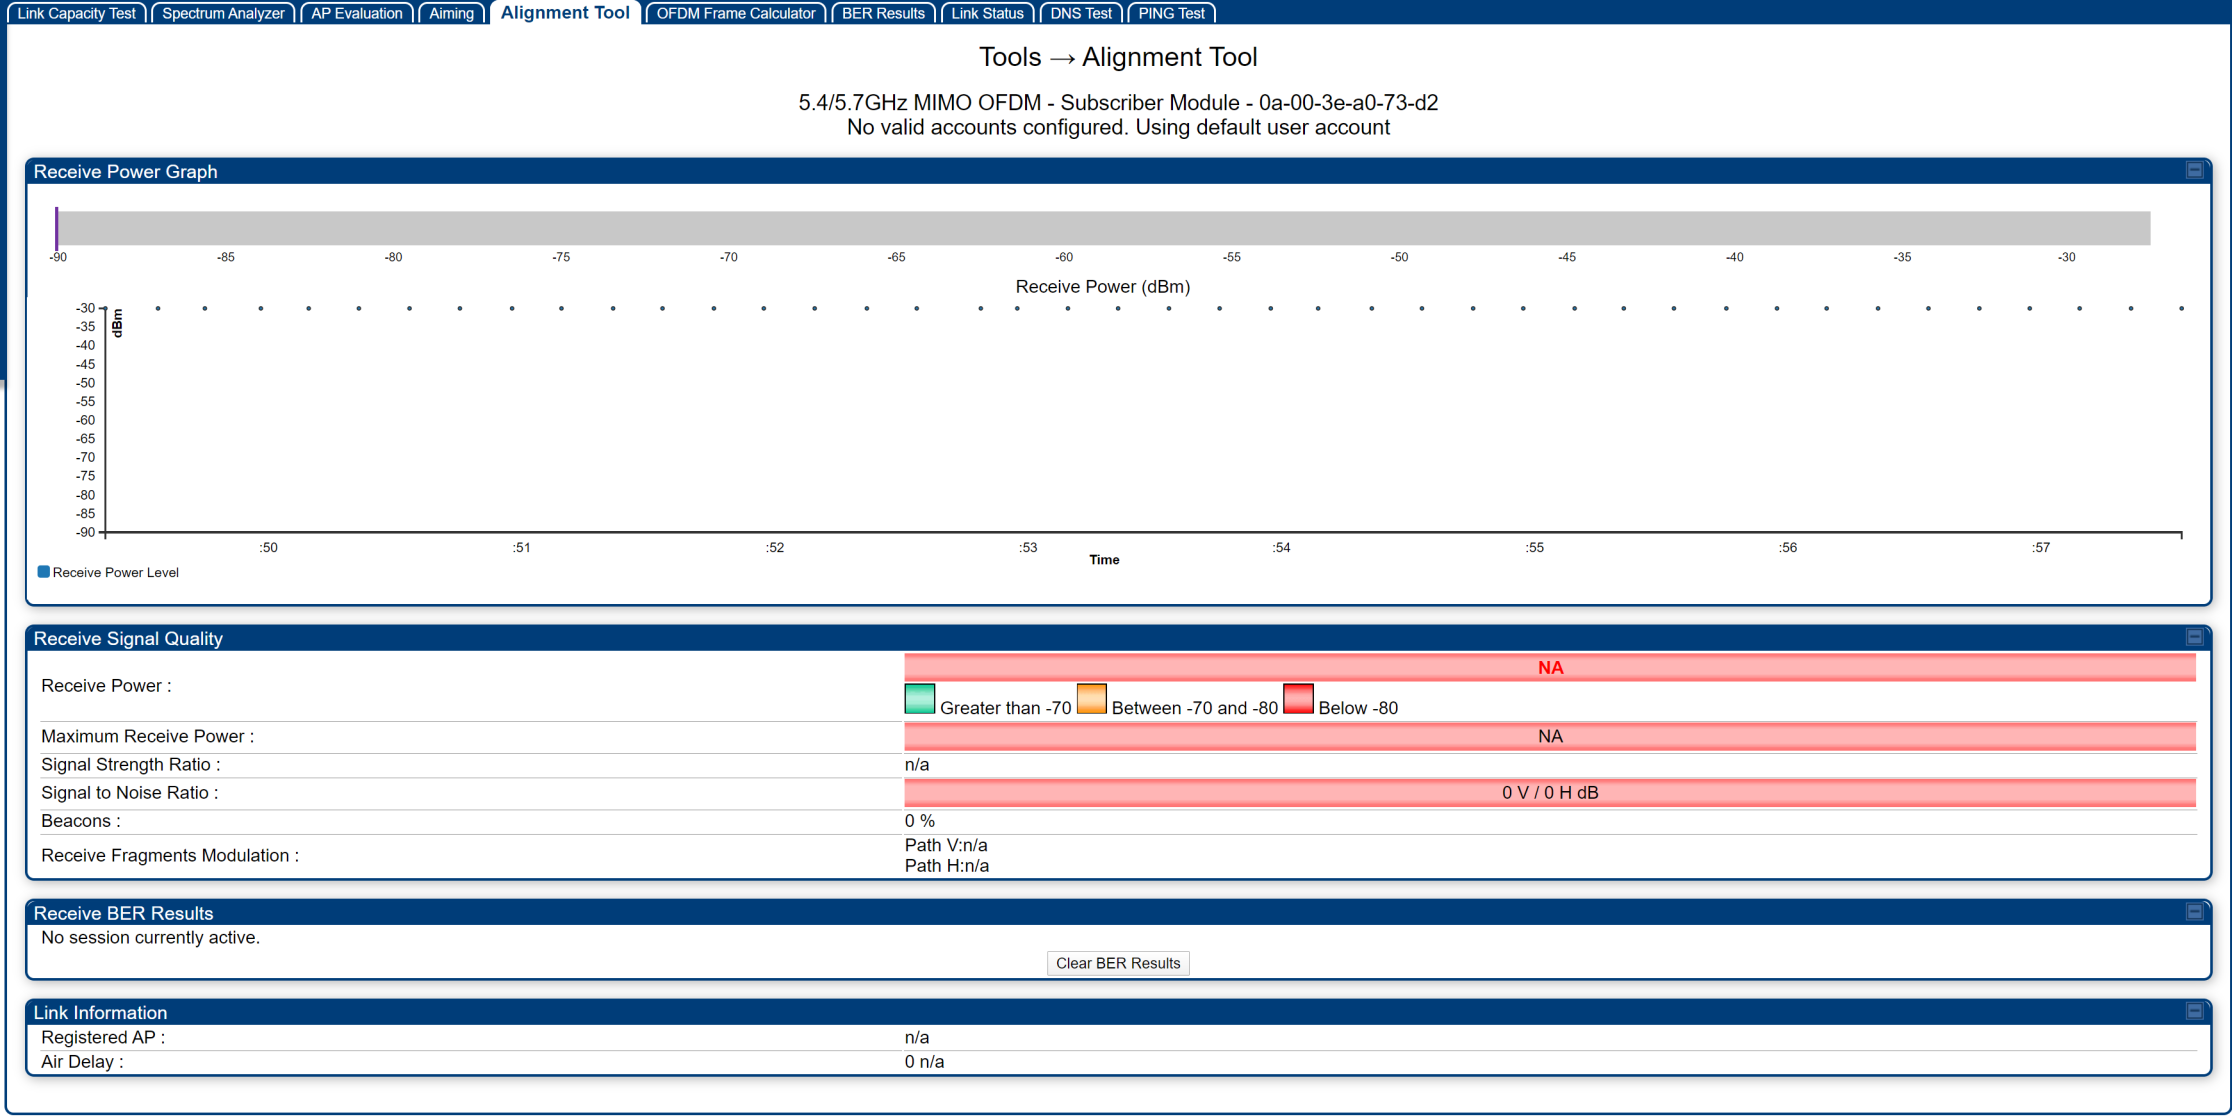
A wireless link throughput test and alignment tools can also be used to verify and optimise the link, these can be found in the following areas:
Tools > Link Capacity Test
Tools > Alignment Tools
Author: Harry Drewett (Wireless Solutions Engineer at Purdicom)
We hope you’ve found this post useful and informative. For more information on anything related to cnMaestro, Cambium Networks or configuration, please contact us on +44 (0) 333 1212 100 or email sales@purdi.com